Exhaust and some details

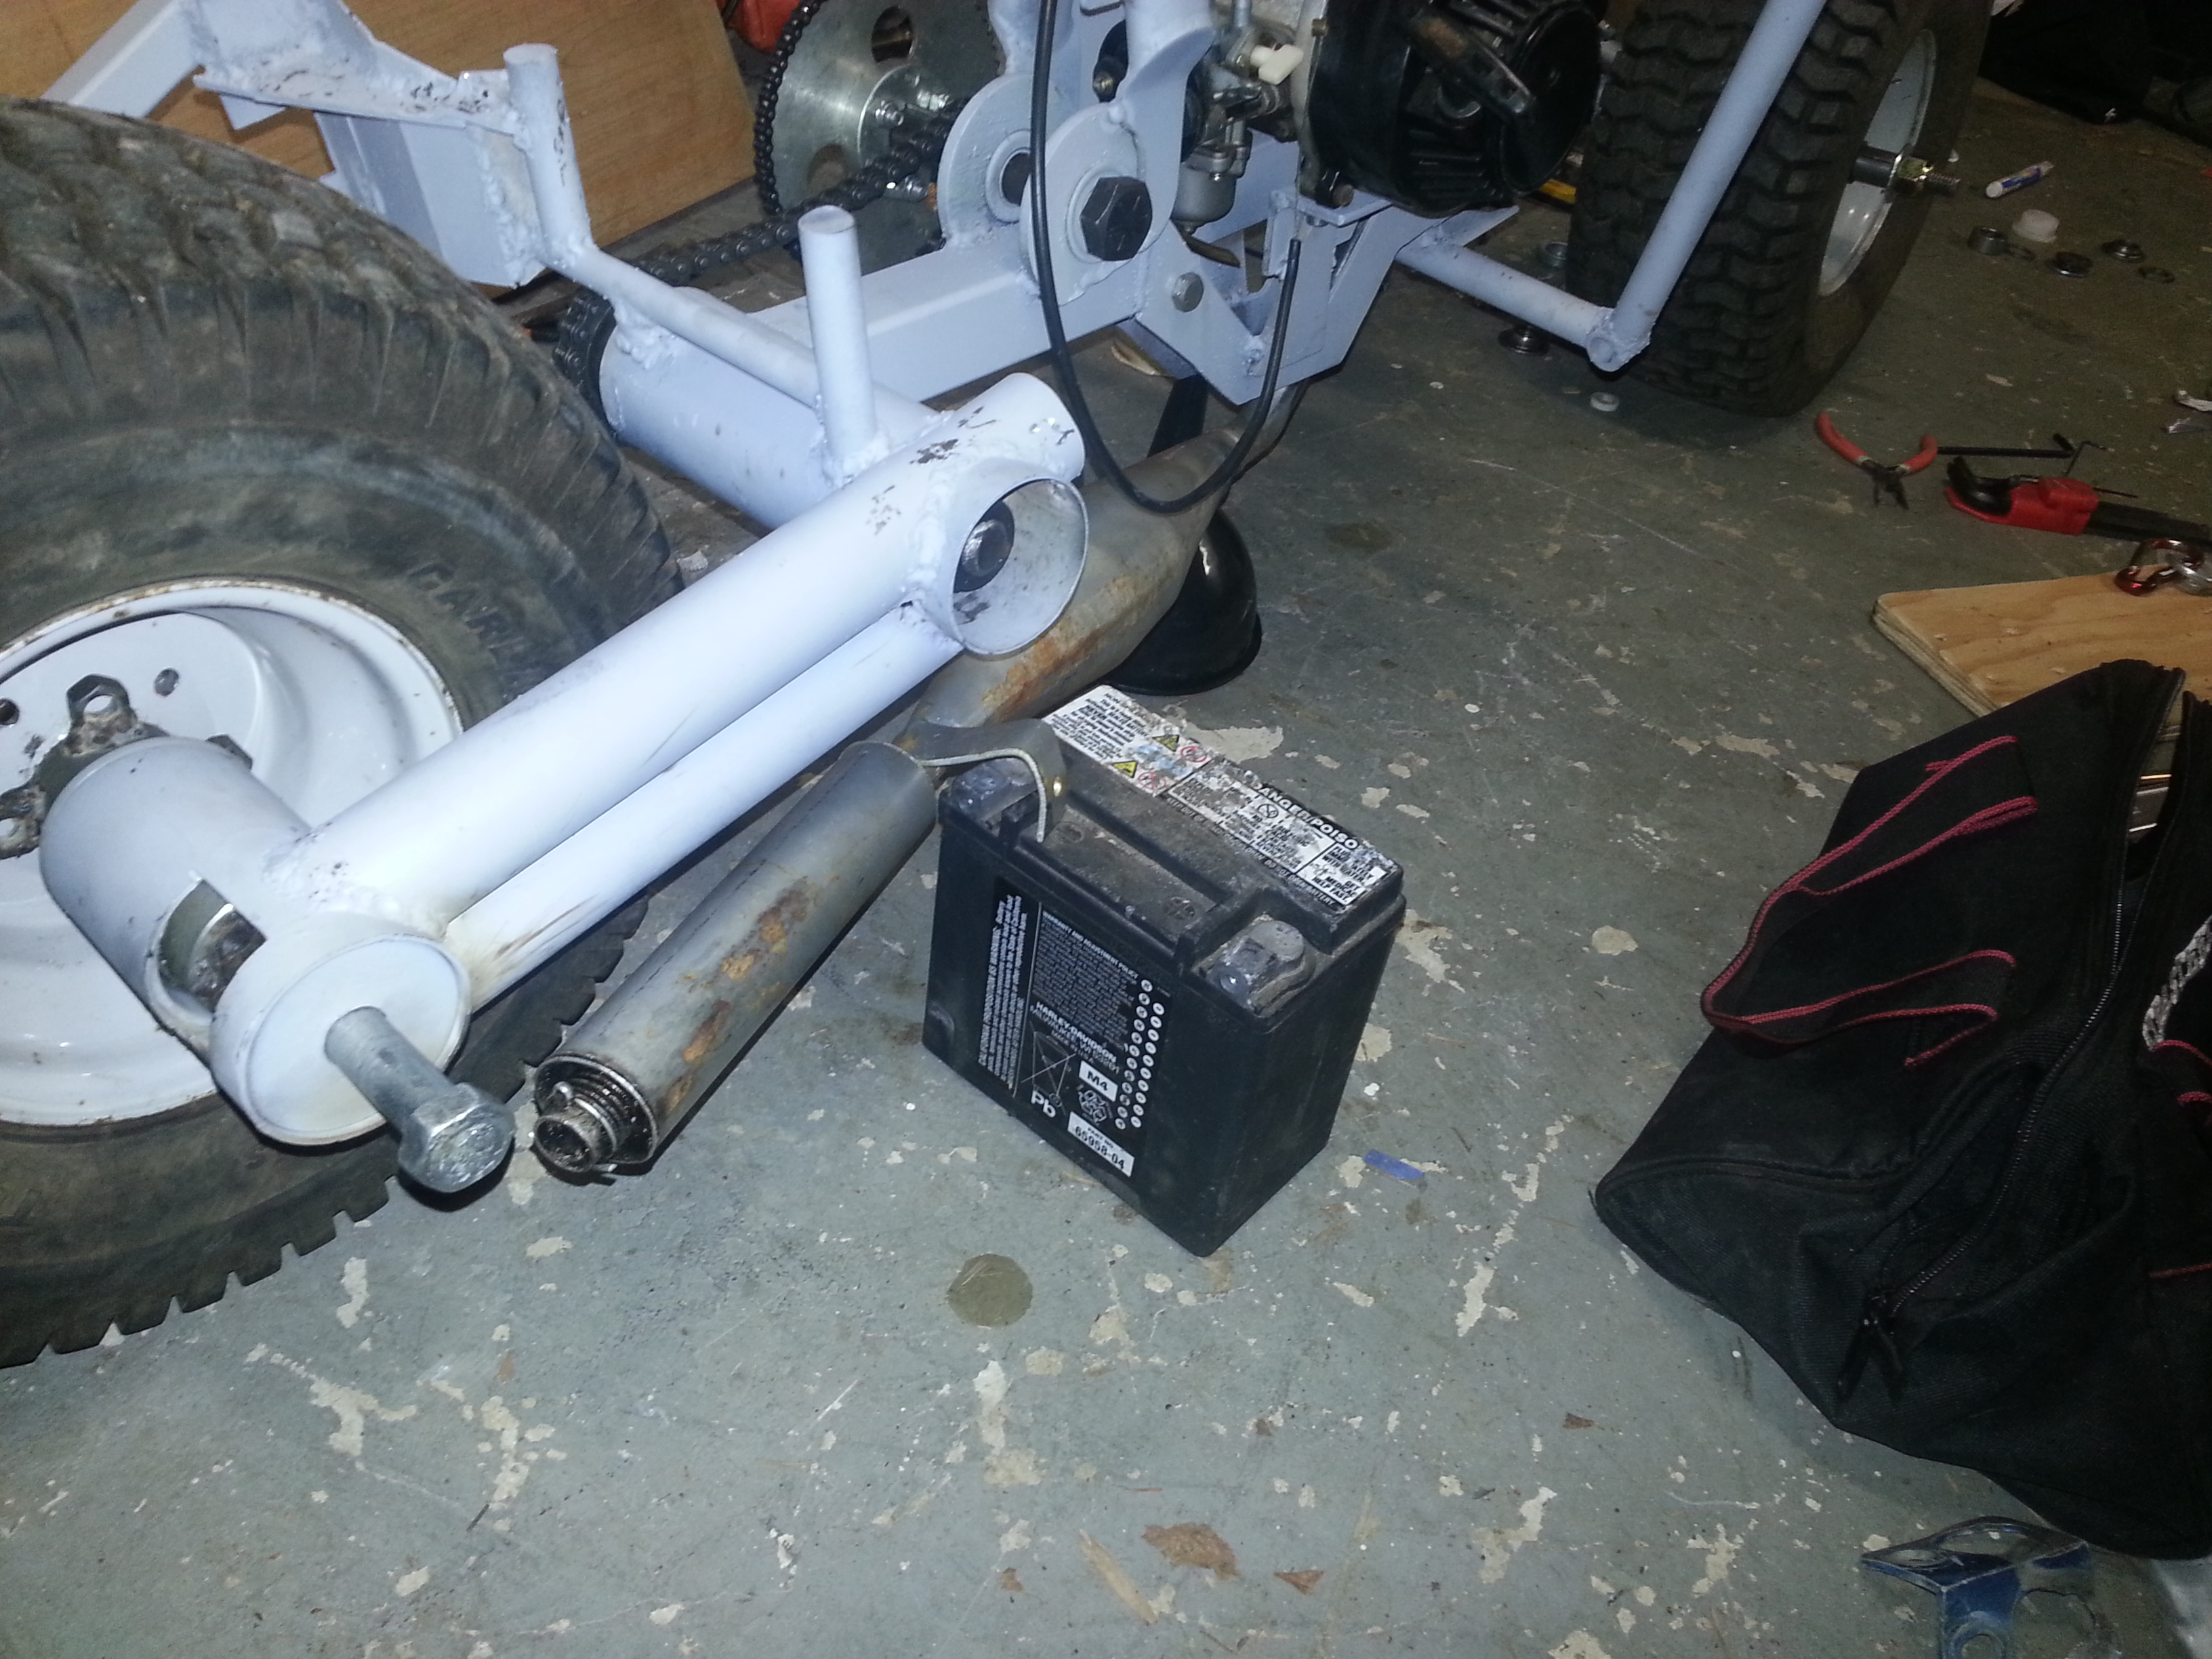
Got a pretty big hurdle out of the way, which was routing the exhaust.  The real Batpod, they hid to the exhaust by running it inside the frame to further the illusion that there is no gas motor in it.  But this option was easier for them since they used a 4-stroke.  I’m using a 2-stroke motor, and the expansion chamber is both required, and can’t be highly modified (at least not easily).   So, I took the whole Batpod and the pipe that came with the motor to a friend, Fothergill (thanks again!), who has a good welder, and who himself is a much better welder than me.  We modified it to go straight down, back, then angle out.  It actually goes between the frame rails under the motor, so a little hard to see what’s going on, but that’s really the point, to have it as hidden as possible.
20140627_004743

20140619_235236

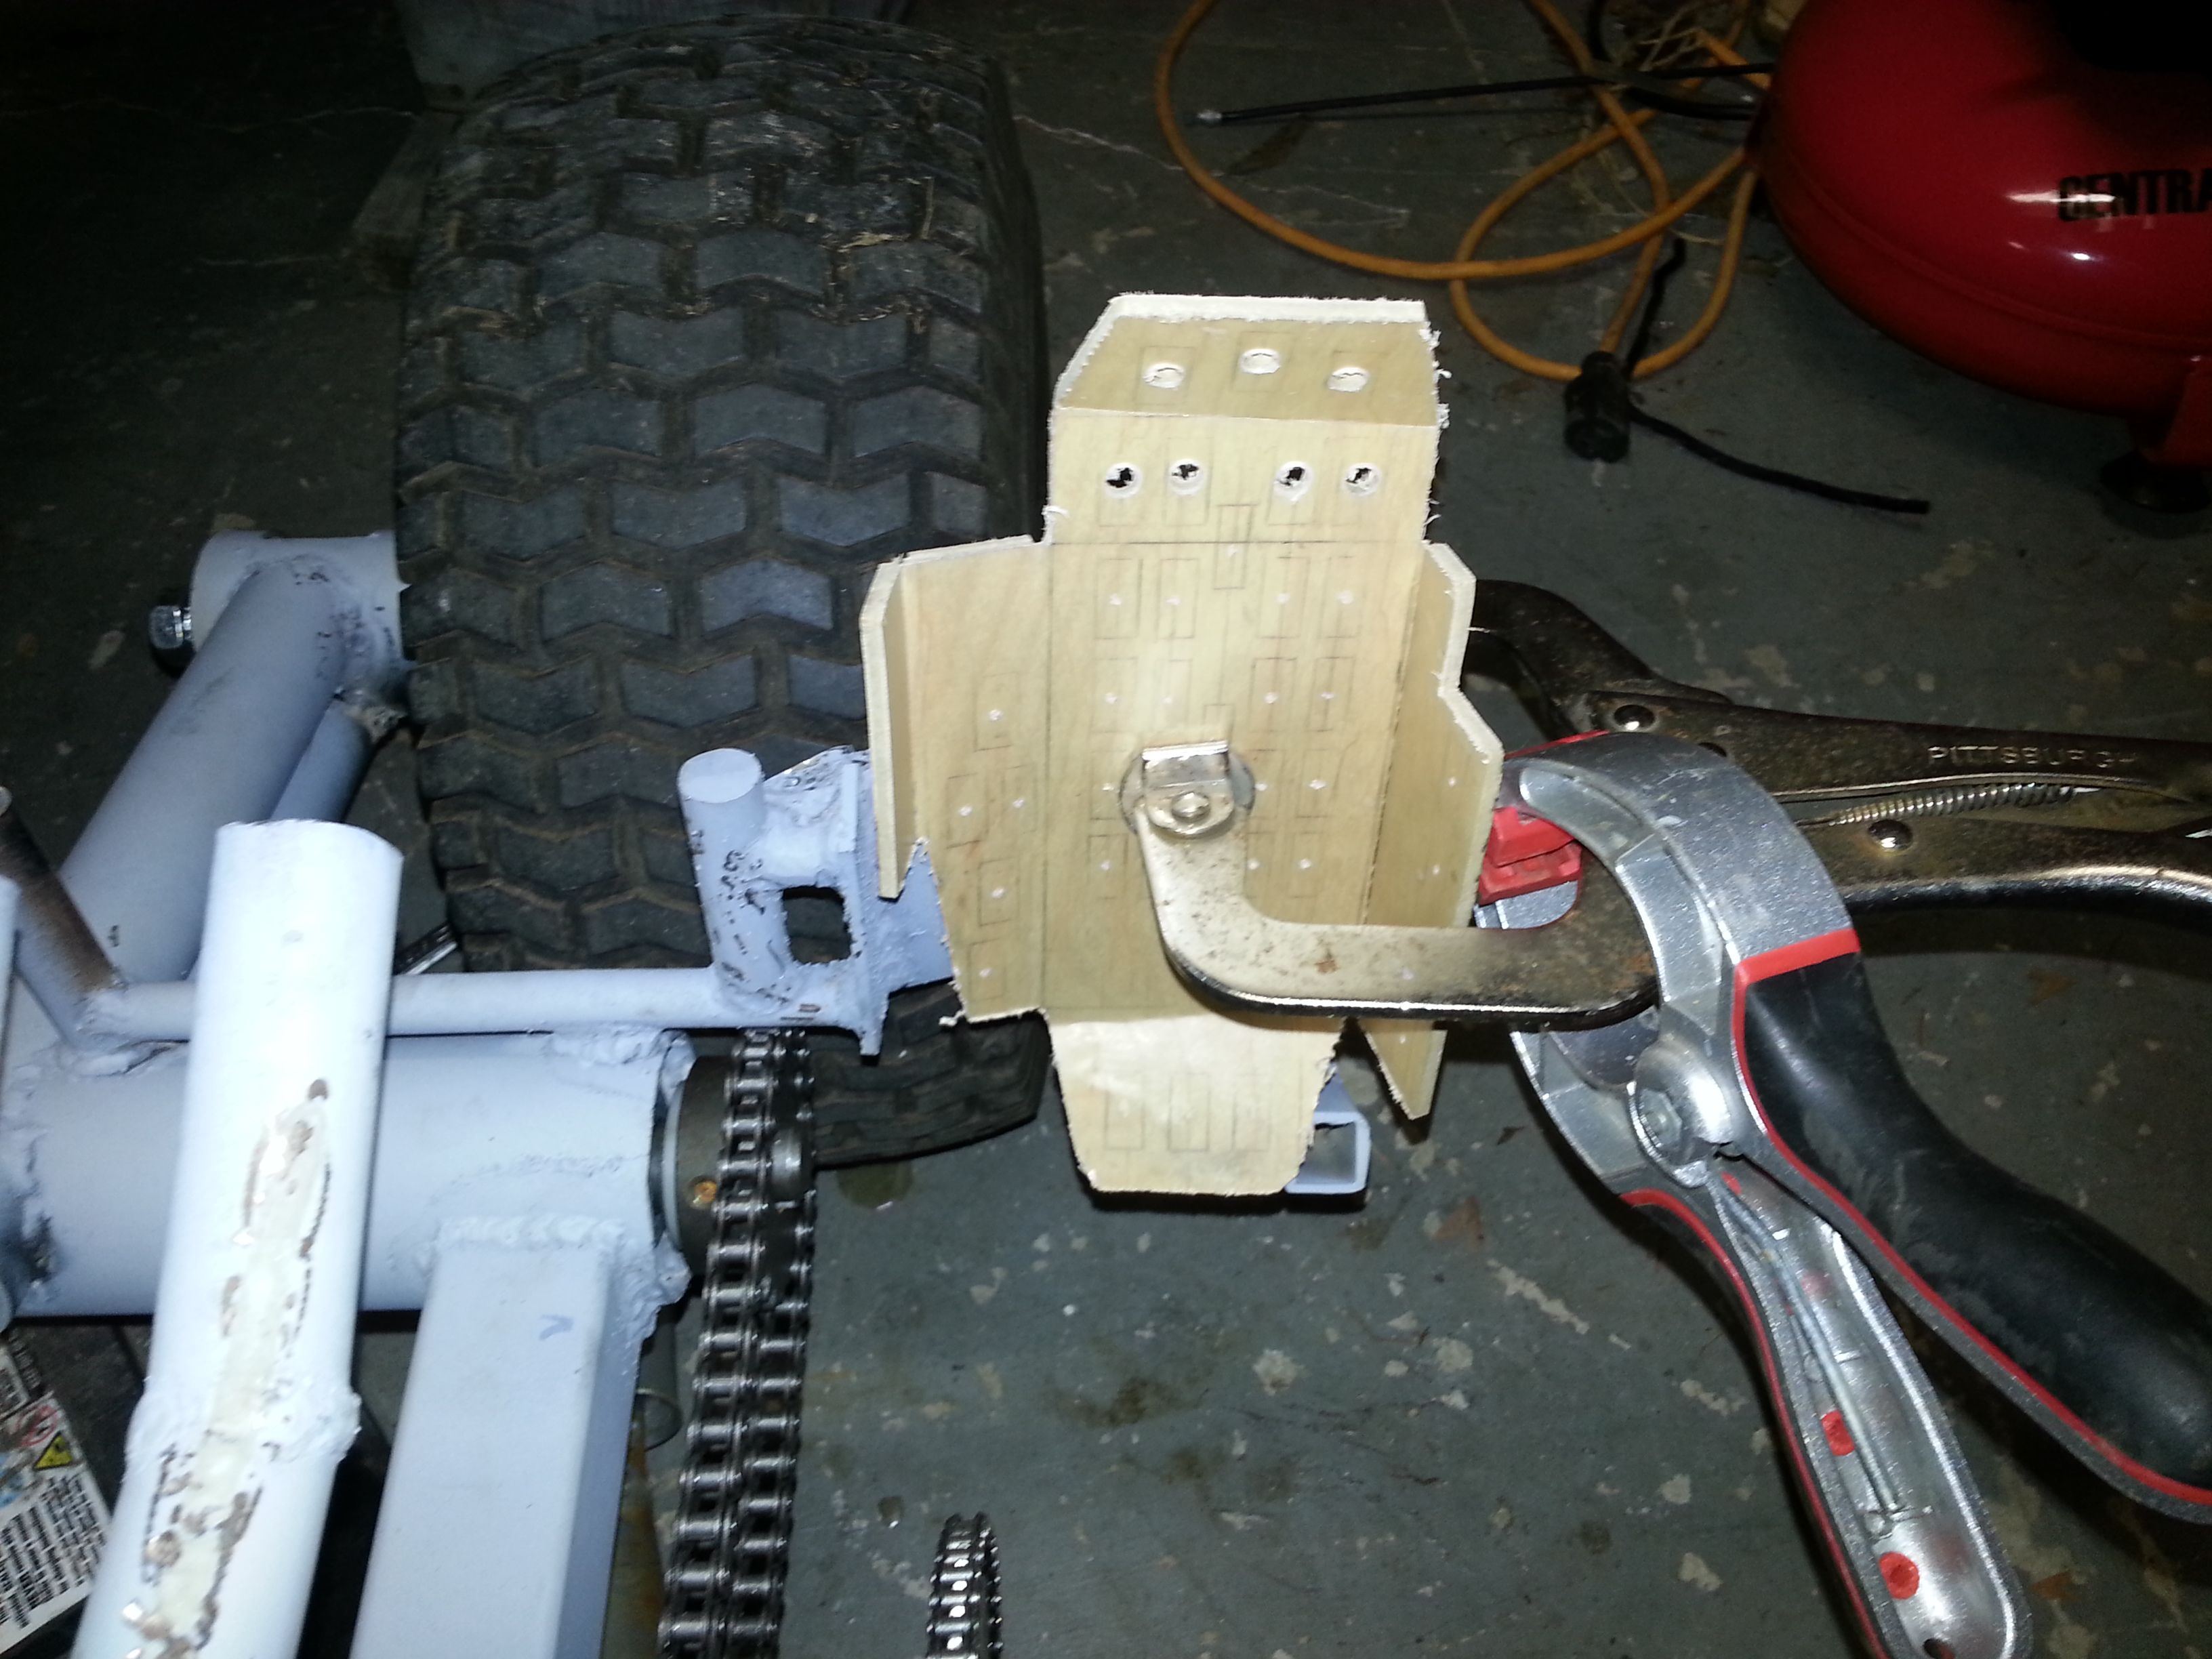
I also began work on the foot rests.  Here’s the left side one.  Using thin plywood, then fiberglass cloth over that, all backed by steel.  Doing them in fiberglass to save weight, and they are easier to make all the slotted holes in like the real ones have.

20140622_190659

Putting chains on

I put the rear hub in it’s sleeve, in the rear frame tube, then cut that rear chain to length, and did a little test of the rear jackshaft-to-chain-to-rear hub. The chain running through the top tube, around the sprocket, and back through the bottom tube to the rear sprocket, with no rubbing inside there is awesome if not shocking, haha. The action is nice and smooth, very low friction.

I also cut the front chain to length, and checked the aligment etc of the front sprockets. Lookin good…
20140618_003708

Drivetrain work

Did some work on the drivetrain, trying to get closer to testing the motor, chains, sprockets, jackshafts, bearings, gearing, rear hub, etc. I made the front jackshaft, which has the big sprocket driven by the motor, then turns a small sprocket which then drives the sprocket on the rear jackshaft. This front jackshaft is made from a 3/4 bolt, which I had to grind a groove into for the keyway, for the sprocket keys. It’s ready to install.
20140616_215832

I also made one final spacer (black UHMW) for the rear hub, which helps holds the wheel bearing/race together. I greased the bearing, and assembled the rear hub. It’s finally ready for install into the rear frame tube, so I can cut that rear chain to length etc.
20140617_011702
20140617_011936
20140617_012447

Sorry about the long “Brake”

I’ve had the classic Brakes Blues. I like making stuff move, not making it stop! Anyways, got a few things done, or at least planned.

First off, I needed a way to keep the rear hub and sprocket centered inside the rear frame tube, so I had to go to the big guns. A friend of mine, Keith, from way back in school is now a machinist. I got a wheel bearing to go around the 1″ shaft of the hub, and had him make me a nylon sleeve to match the outside of the bearing race, and the inside of the rear frame tube (thanks Keith!!). Here it is sorta layed out:
20140612_231000
20140612_230348

Next I am workin on the rear brakes. The wheel is so small, it’s hard to get a caliper inside of it. So I’m making a sort of hub to go on the other side of the wheel, which will hold the brake rotor. In this pic, a bike sprocket is showing where the brake rotor will be.
Gonna weld the big washers to the piece of tube, have it bolt to the wheel with the same bolts that hold the hub on the other side.
20140612_230921