More steering work

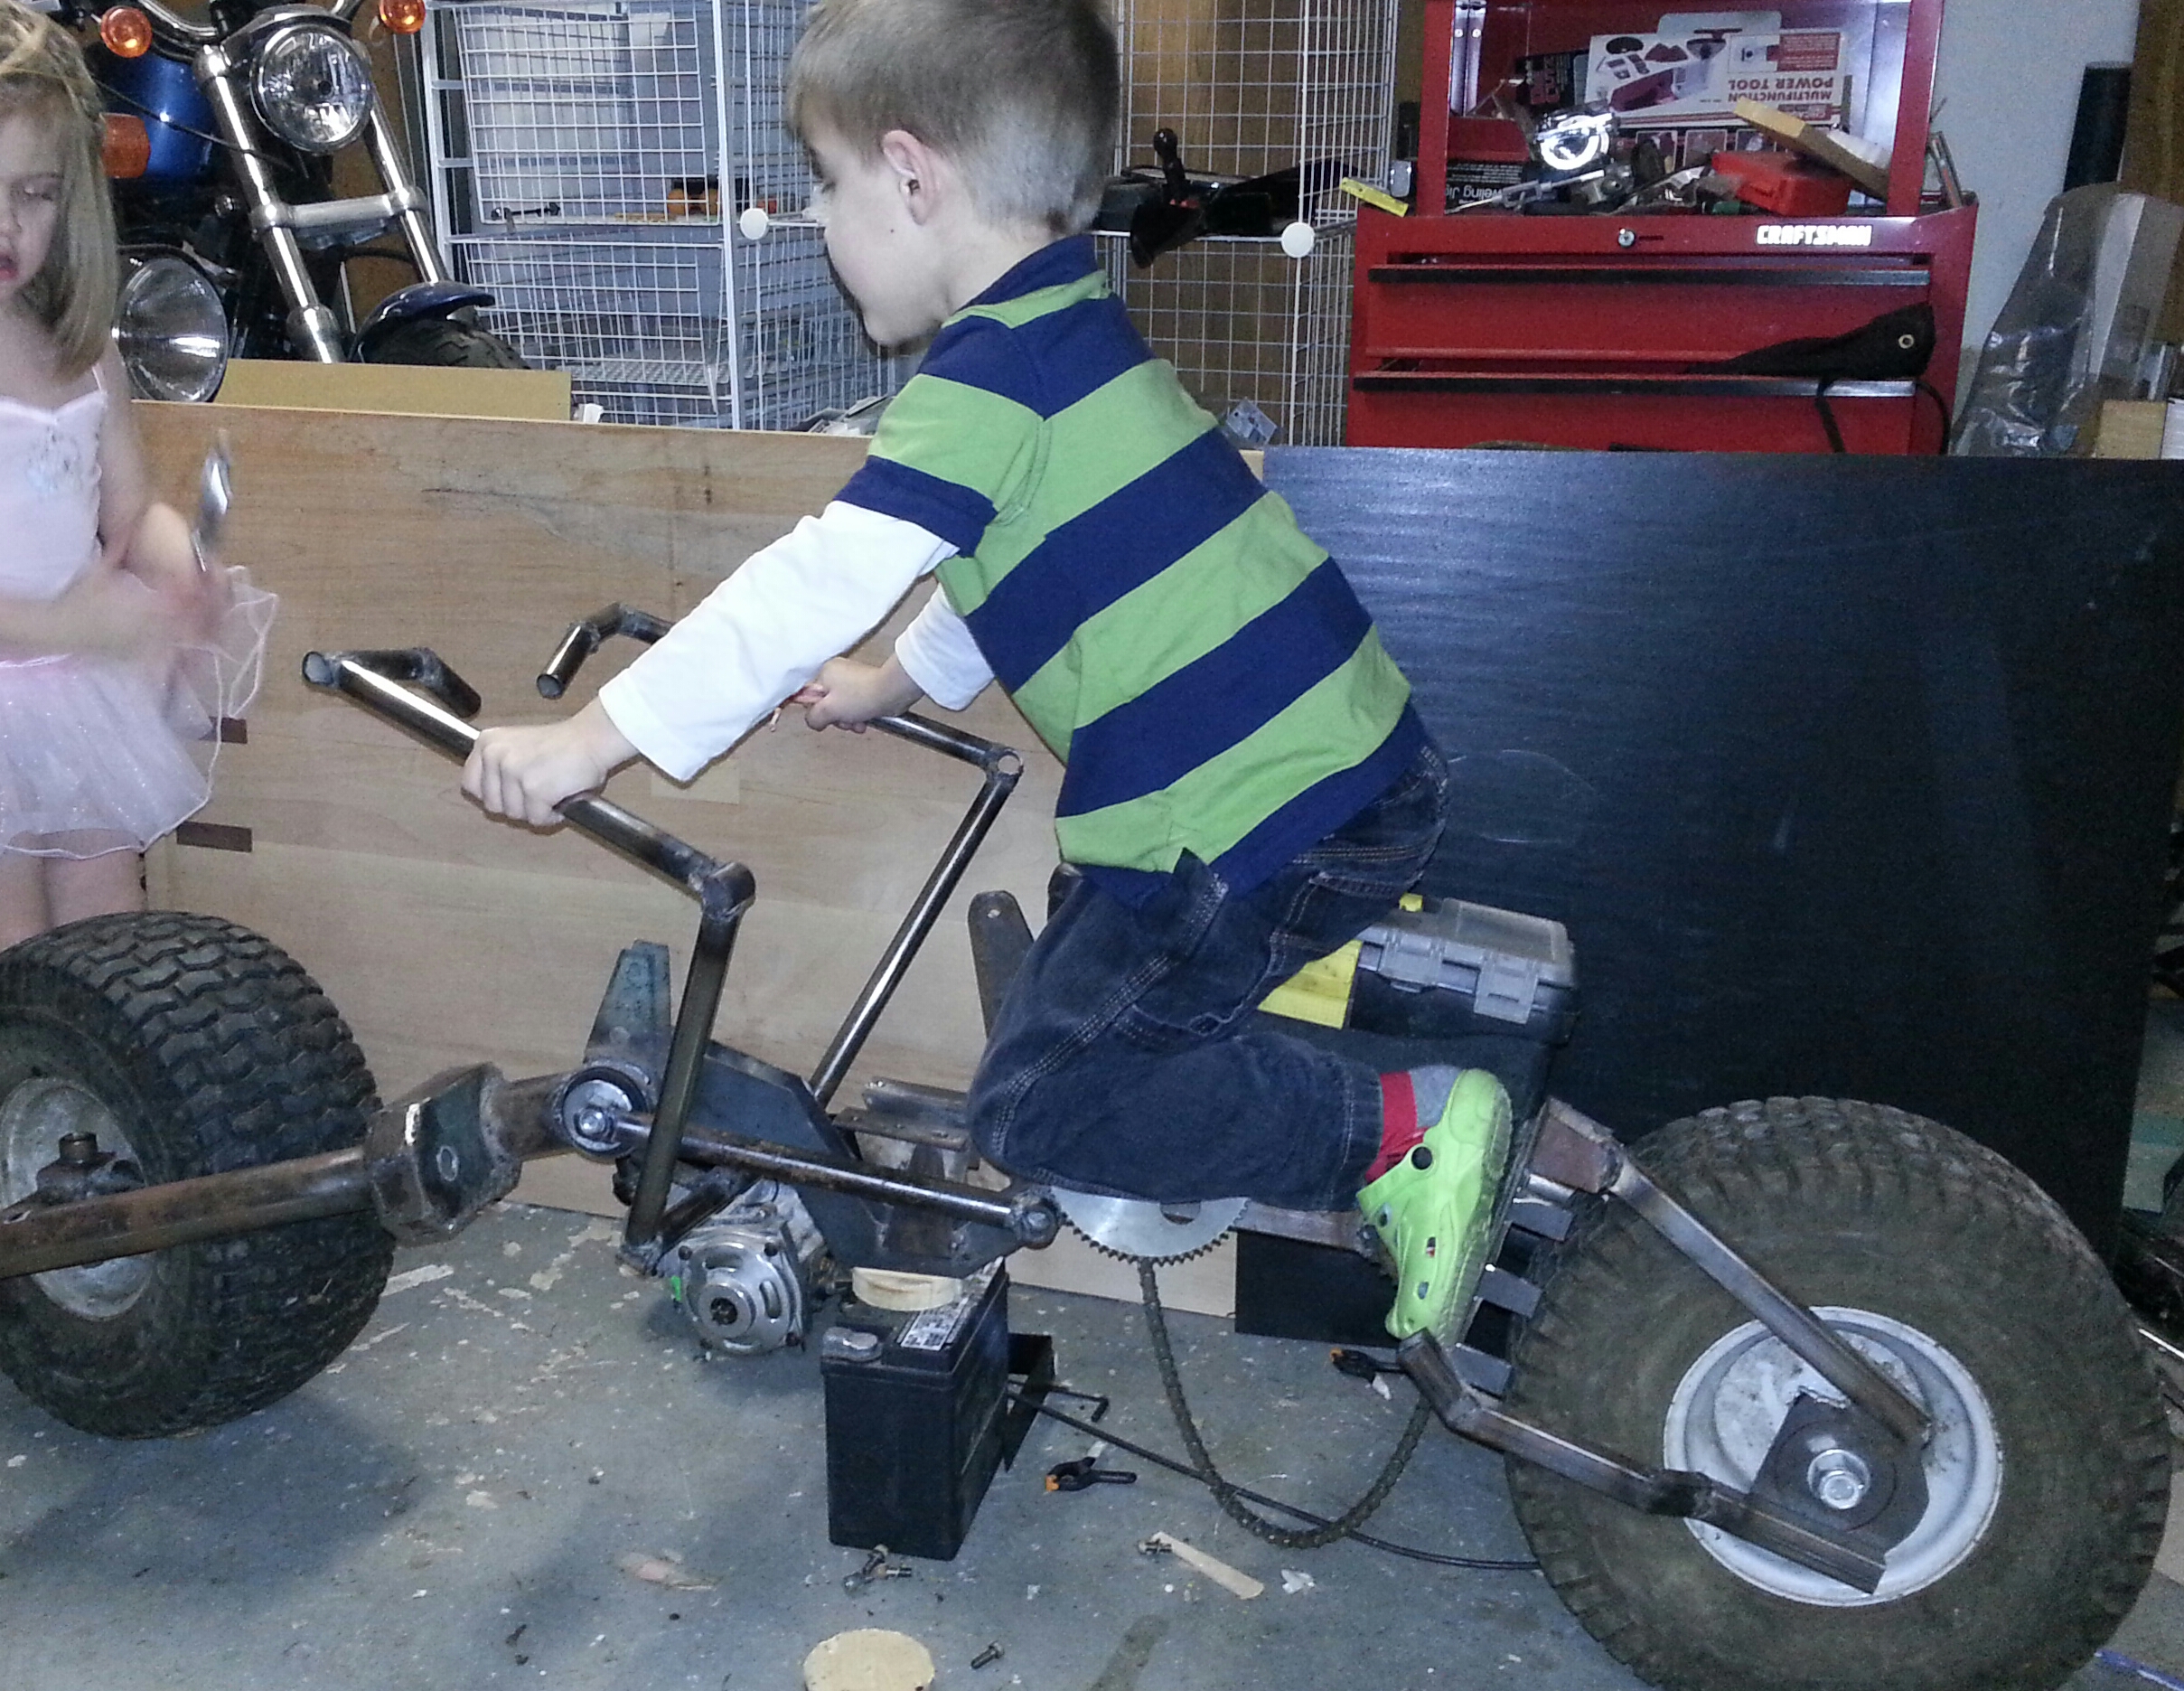
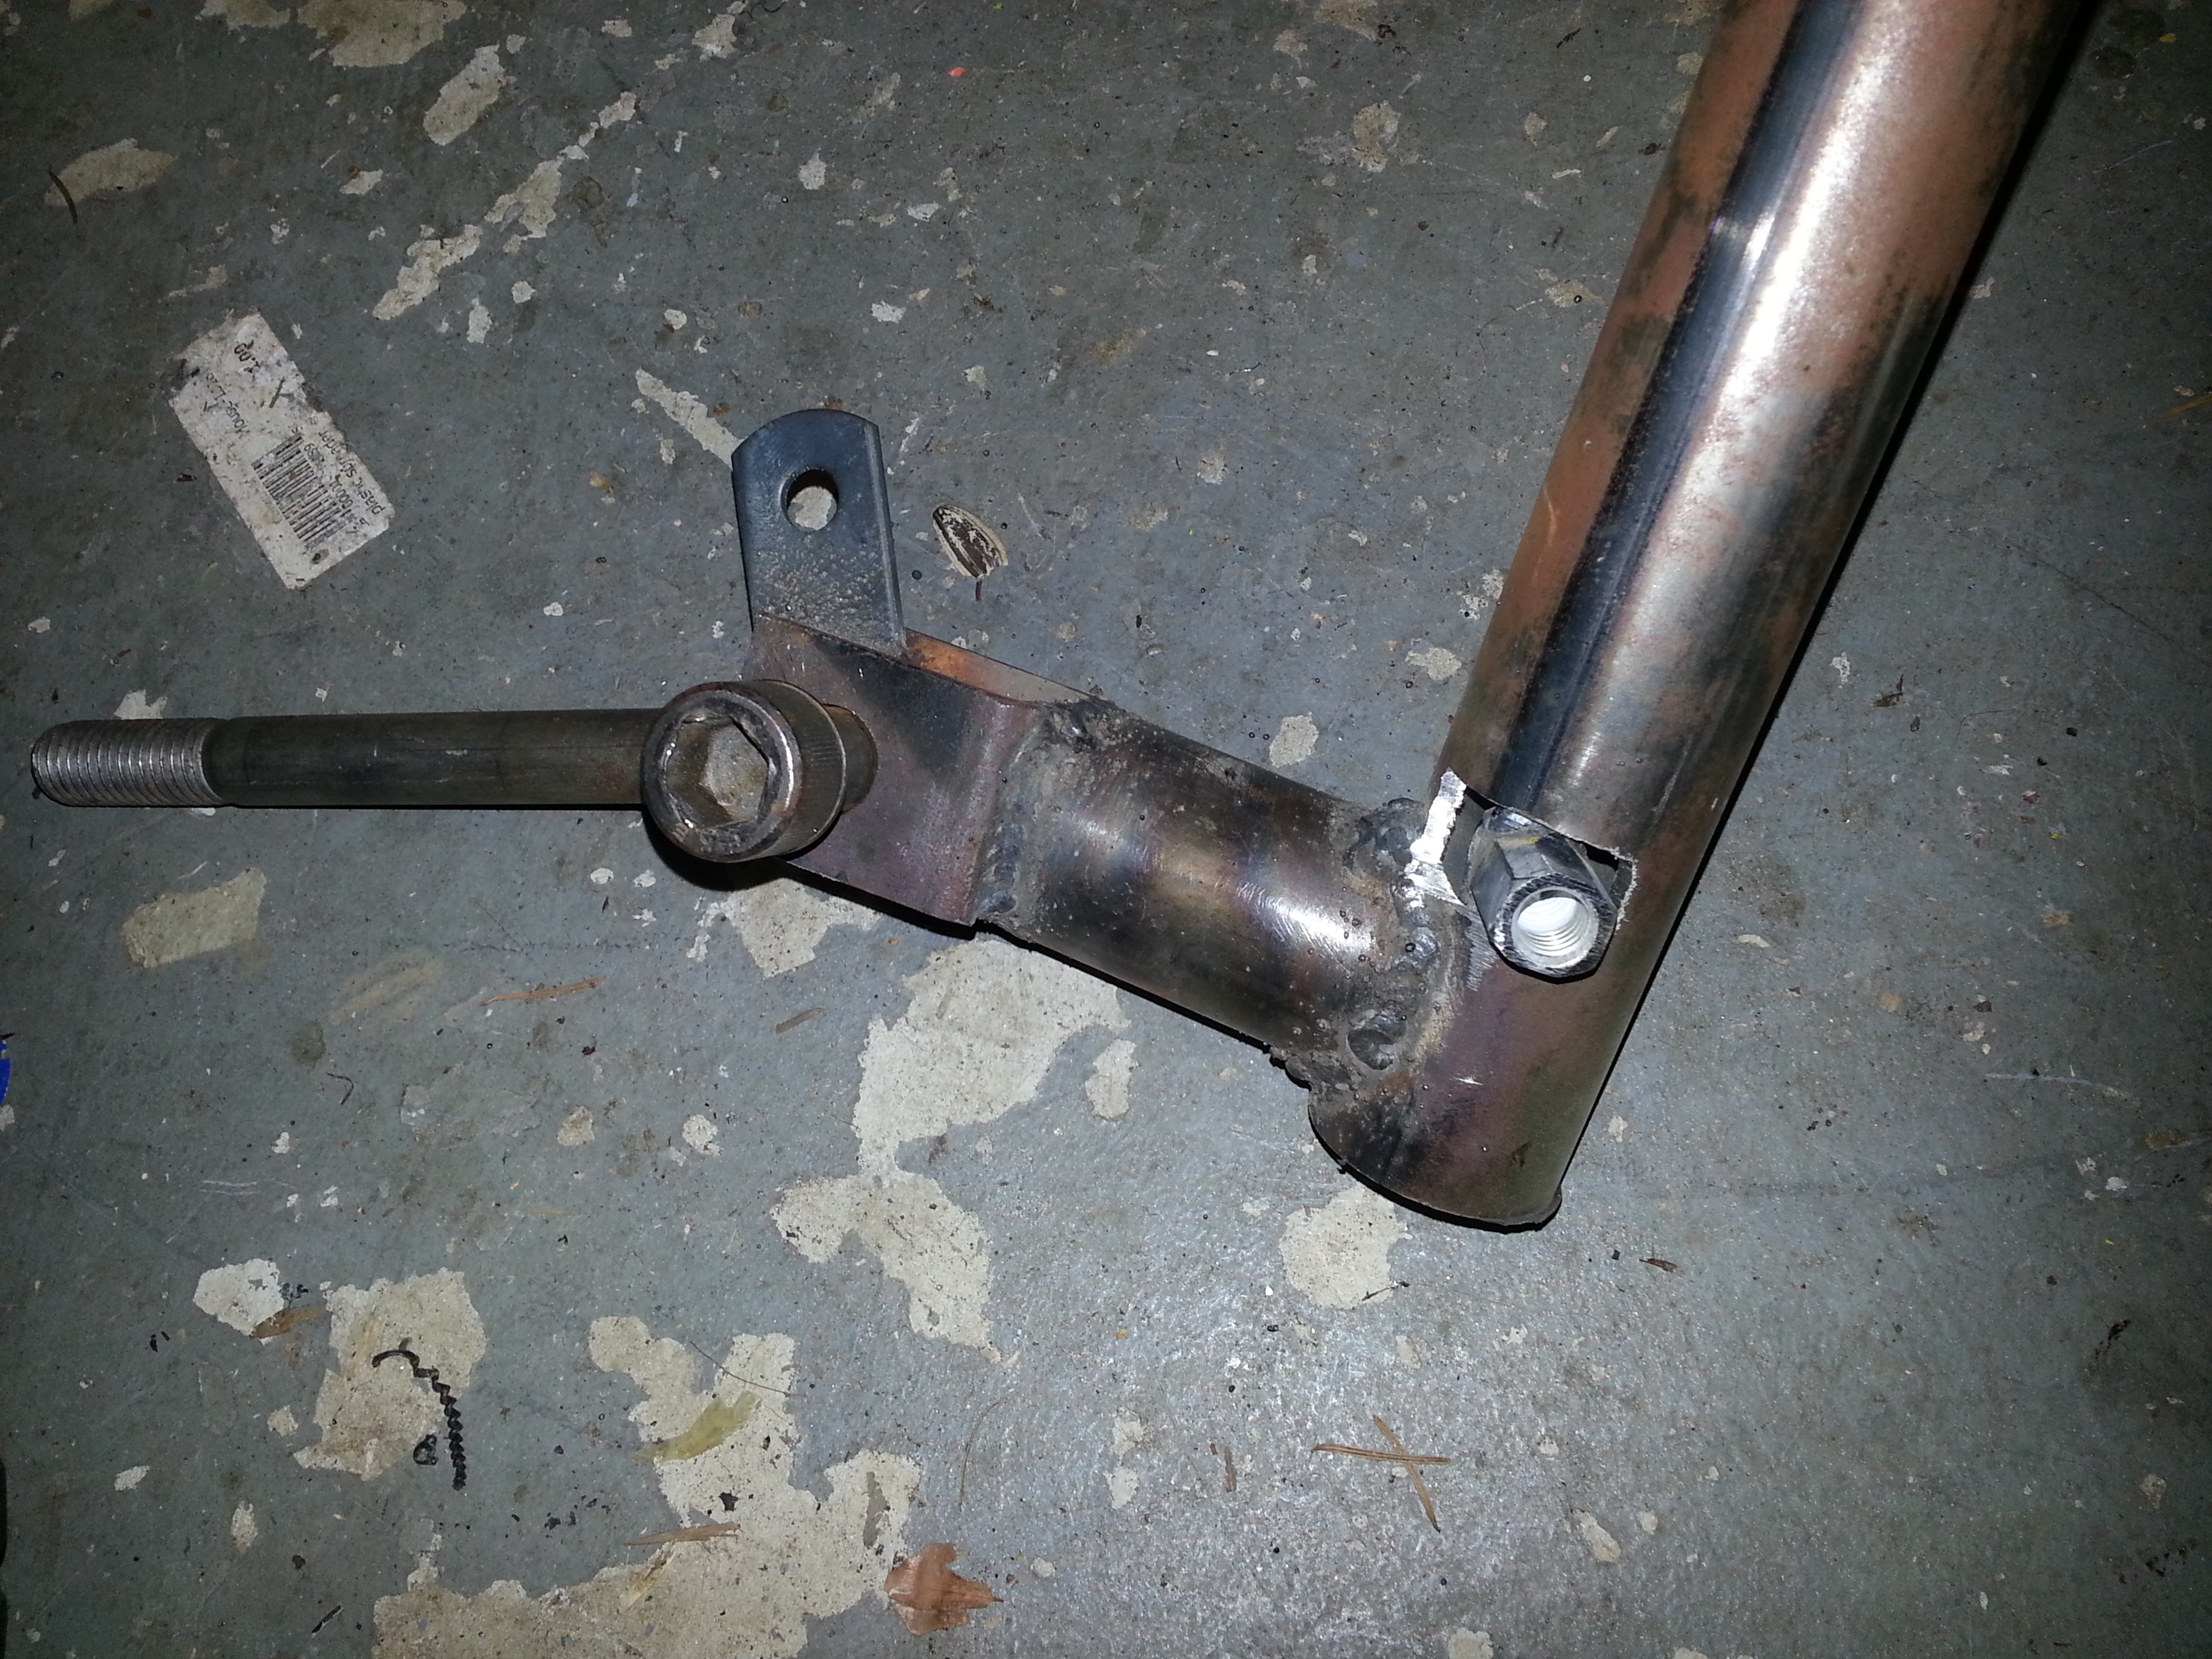
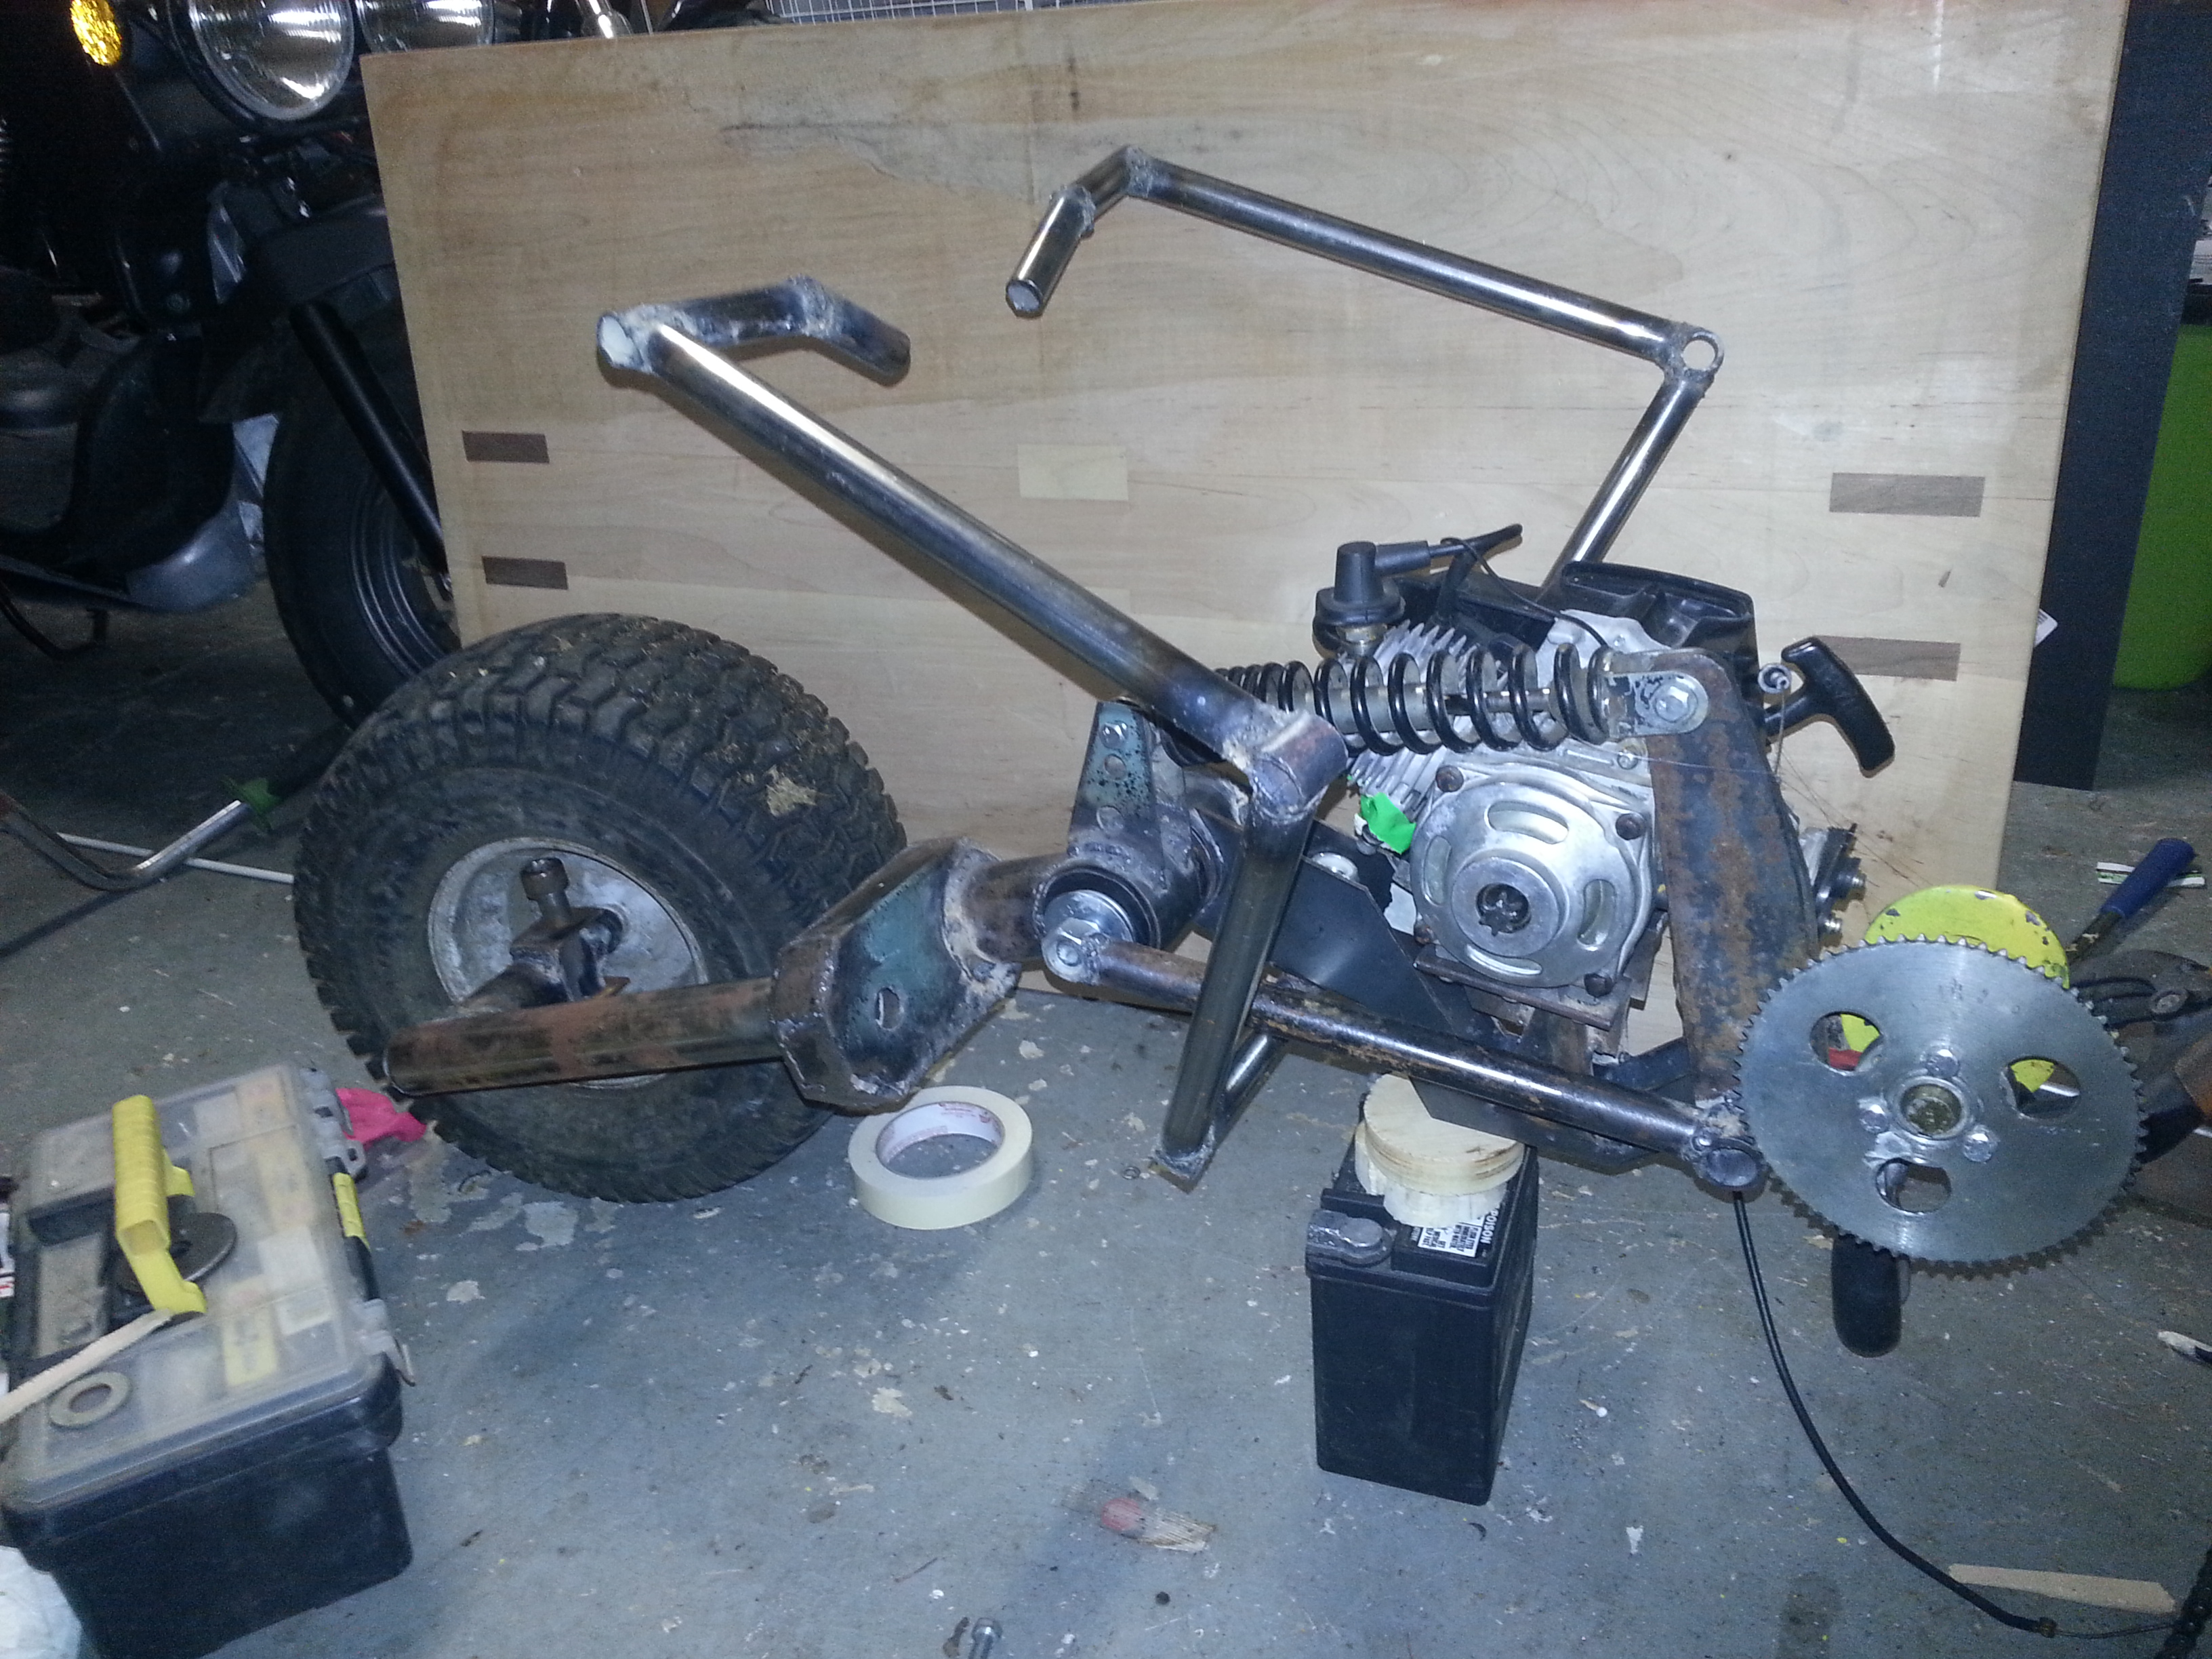
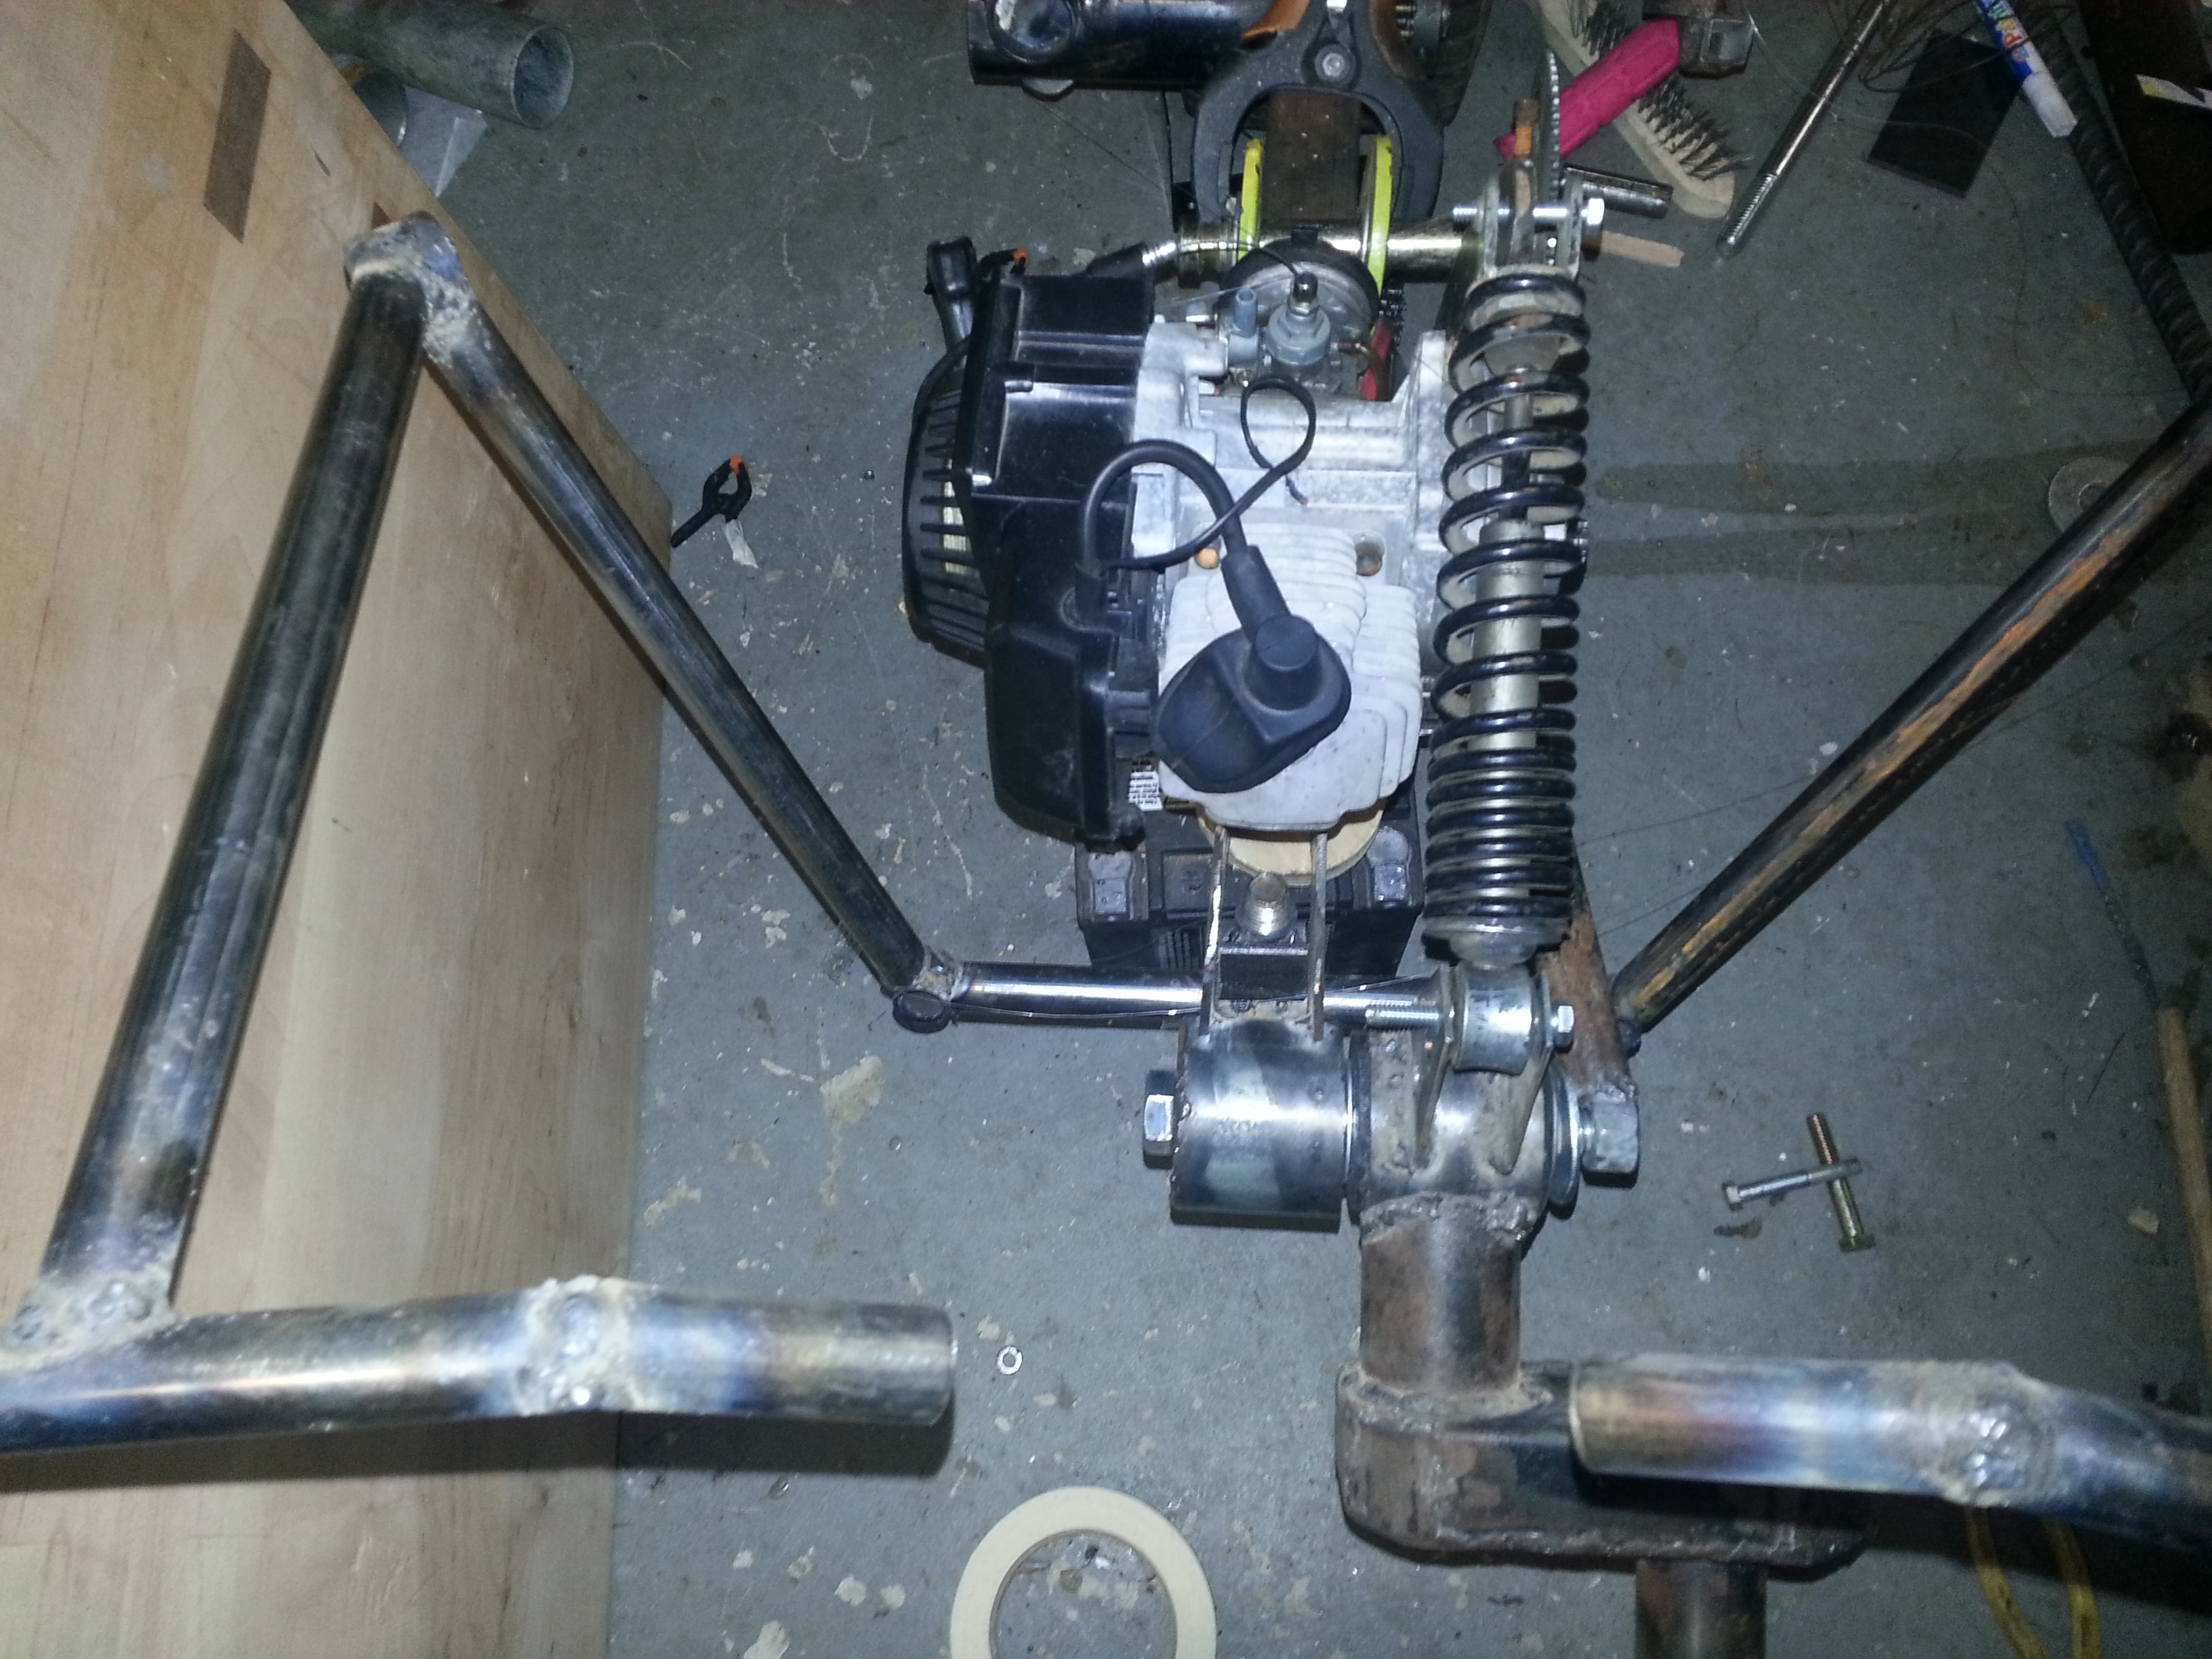
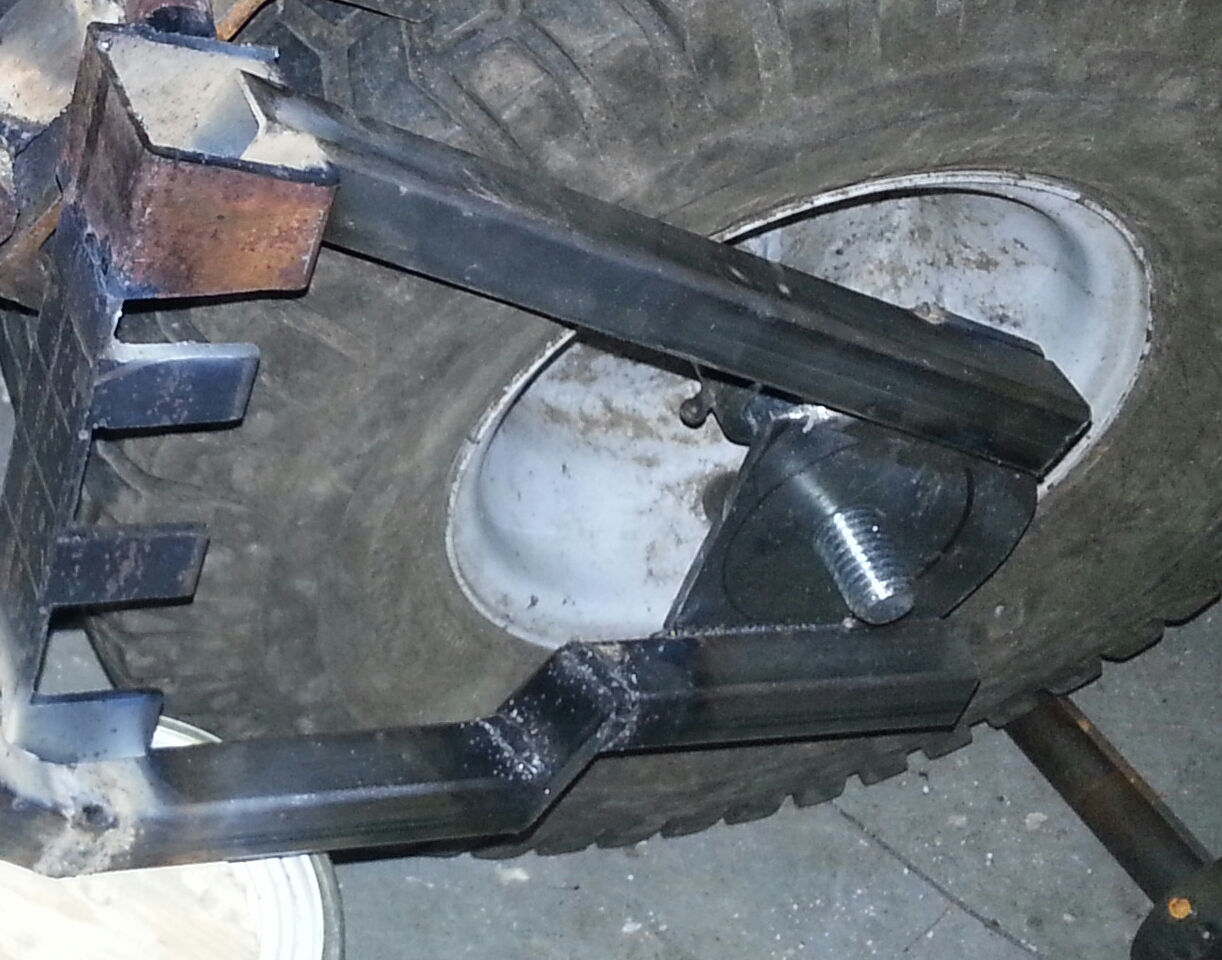
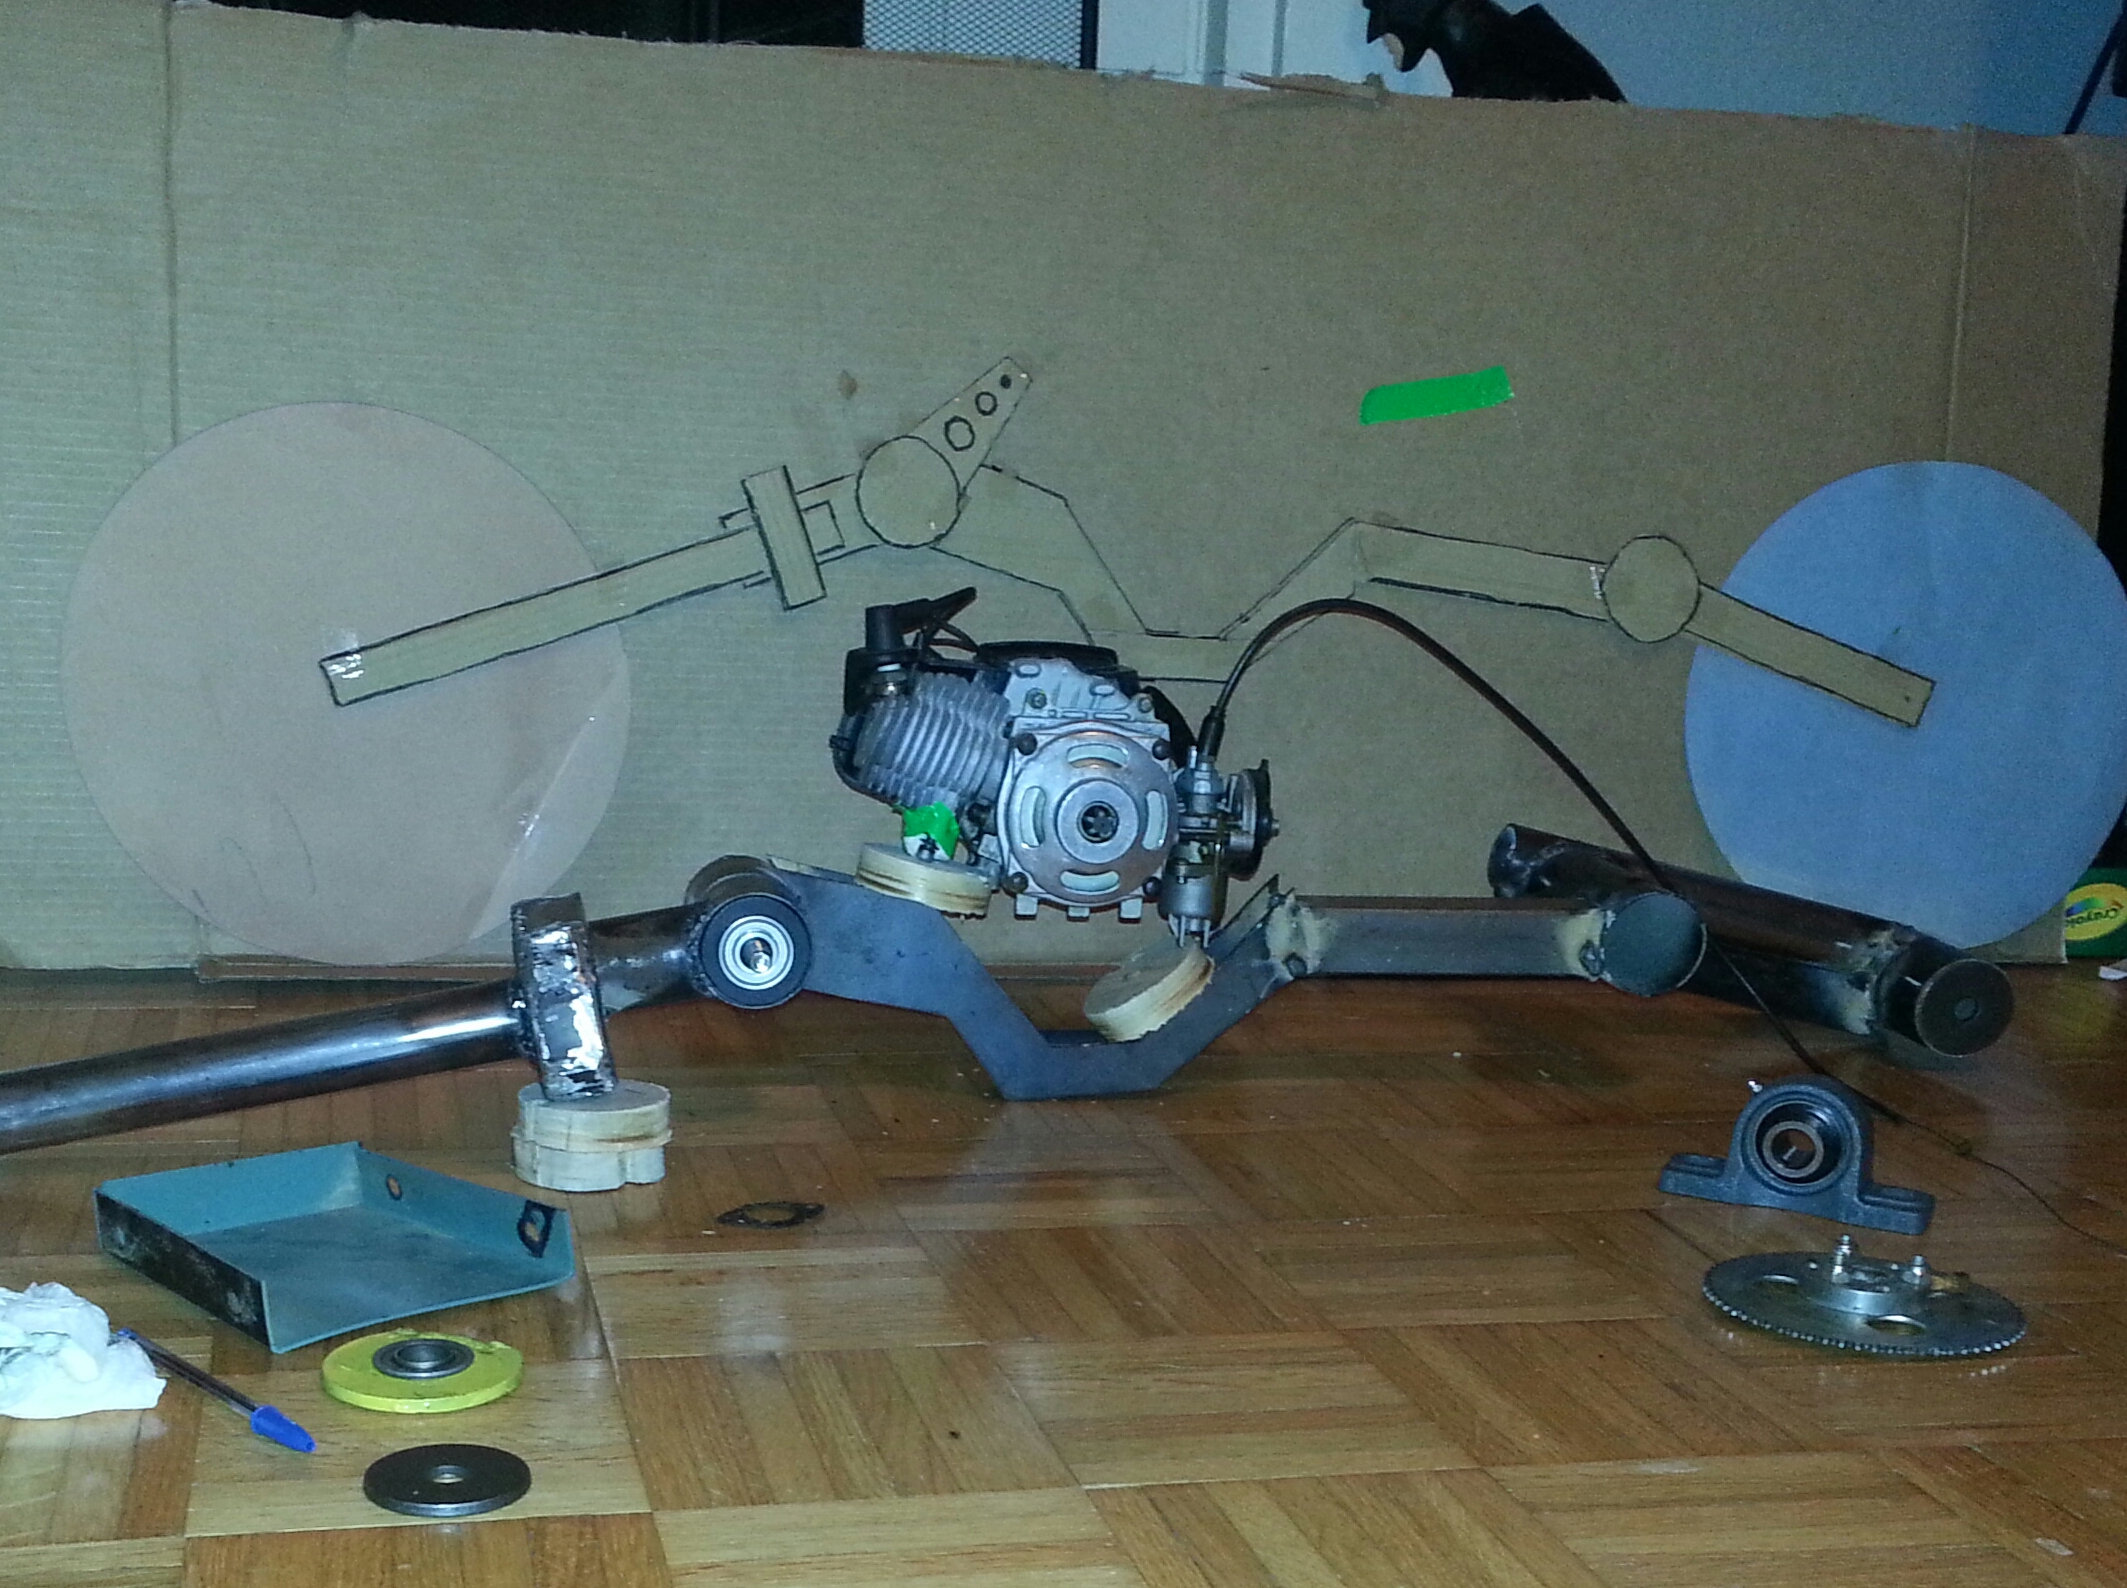
I added some tabs to the handlebars for the upper tie rod, and to the front axle steering spindle, for the lower tie rod, and began working on the steering shaft that goes through the front tube.  I am making the tie-rods out of all thread, and am making 3 of the 4 tie rod ends myself, but may have to buy one where it connects to the pivoting steering shaft.   And of course, had to do a rider test fit.  I haven’t finished the grip part of the bars for him to hold onto, but it looks like he should be able to reach ok etc, and the actual seat will be a tad lower which will help.

20140225_173442-120140225_193015

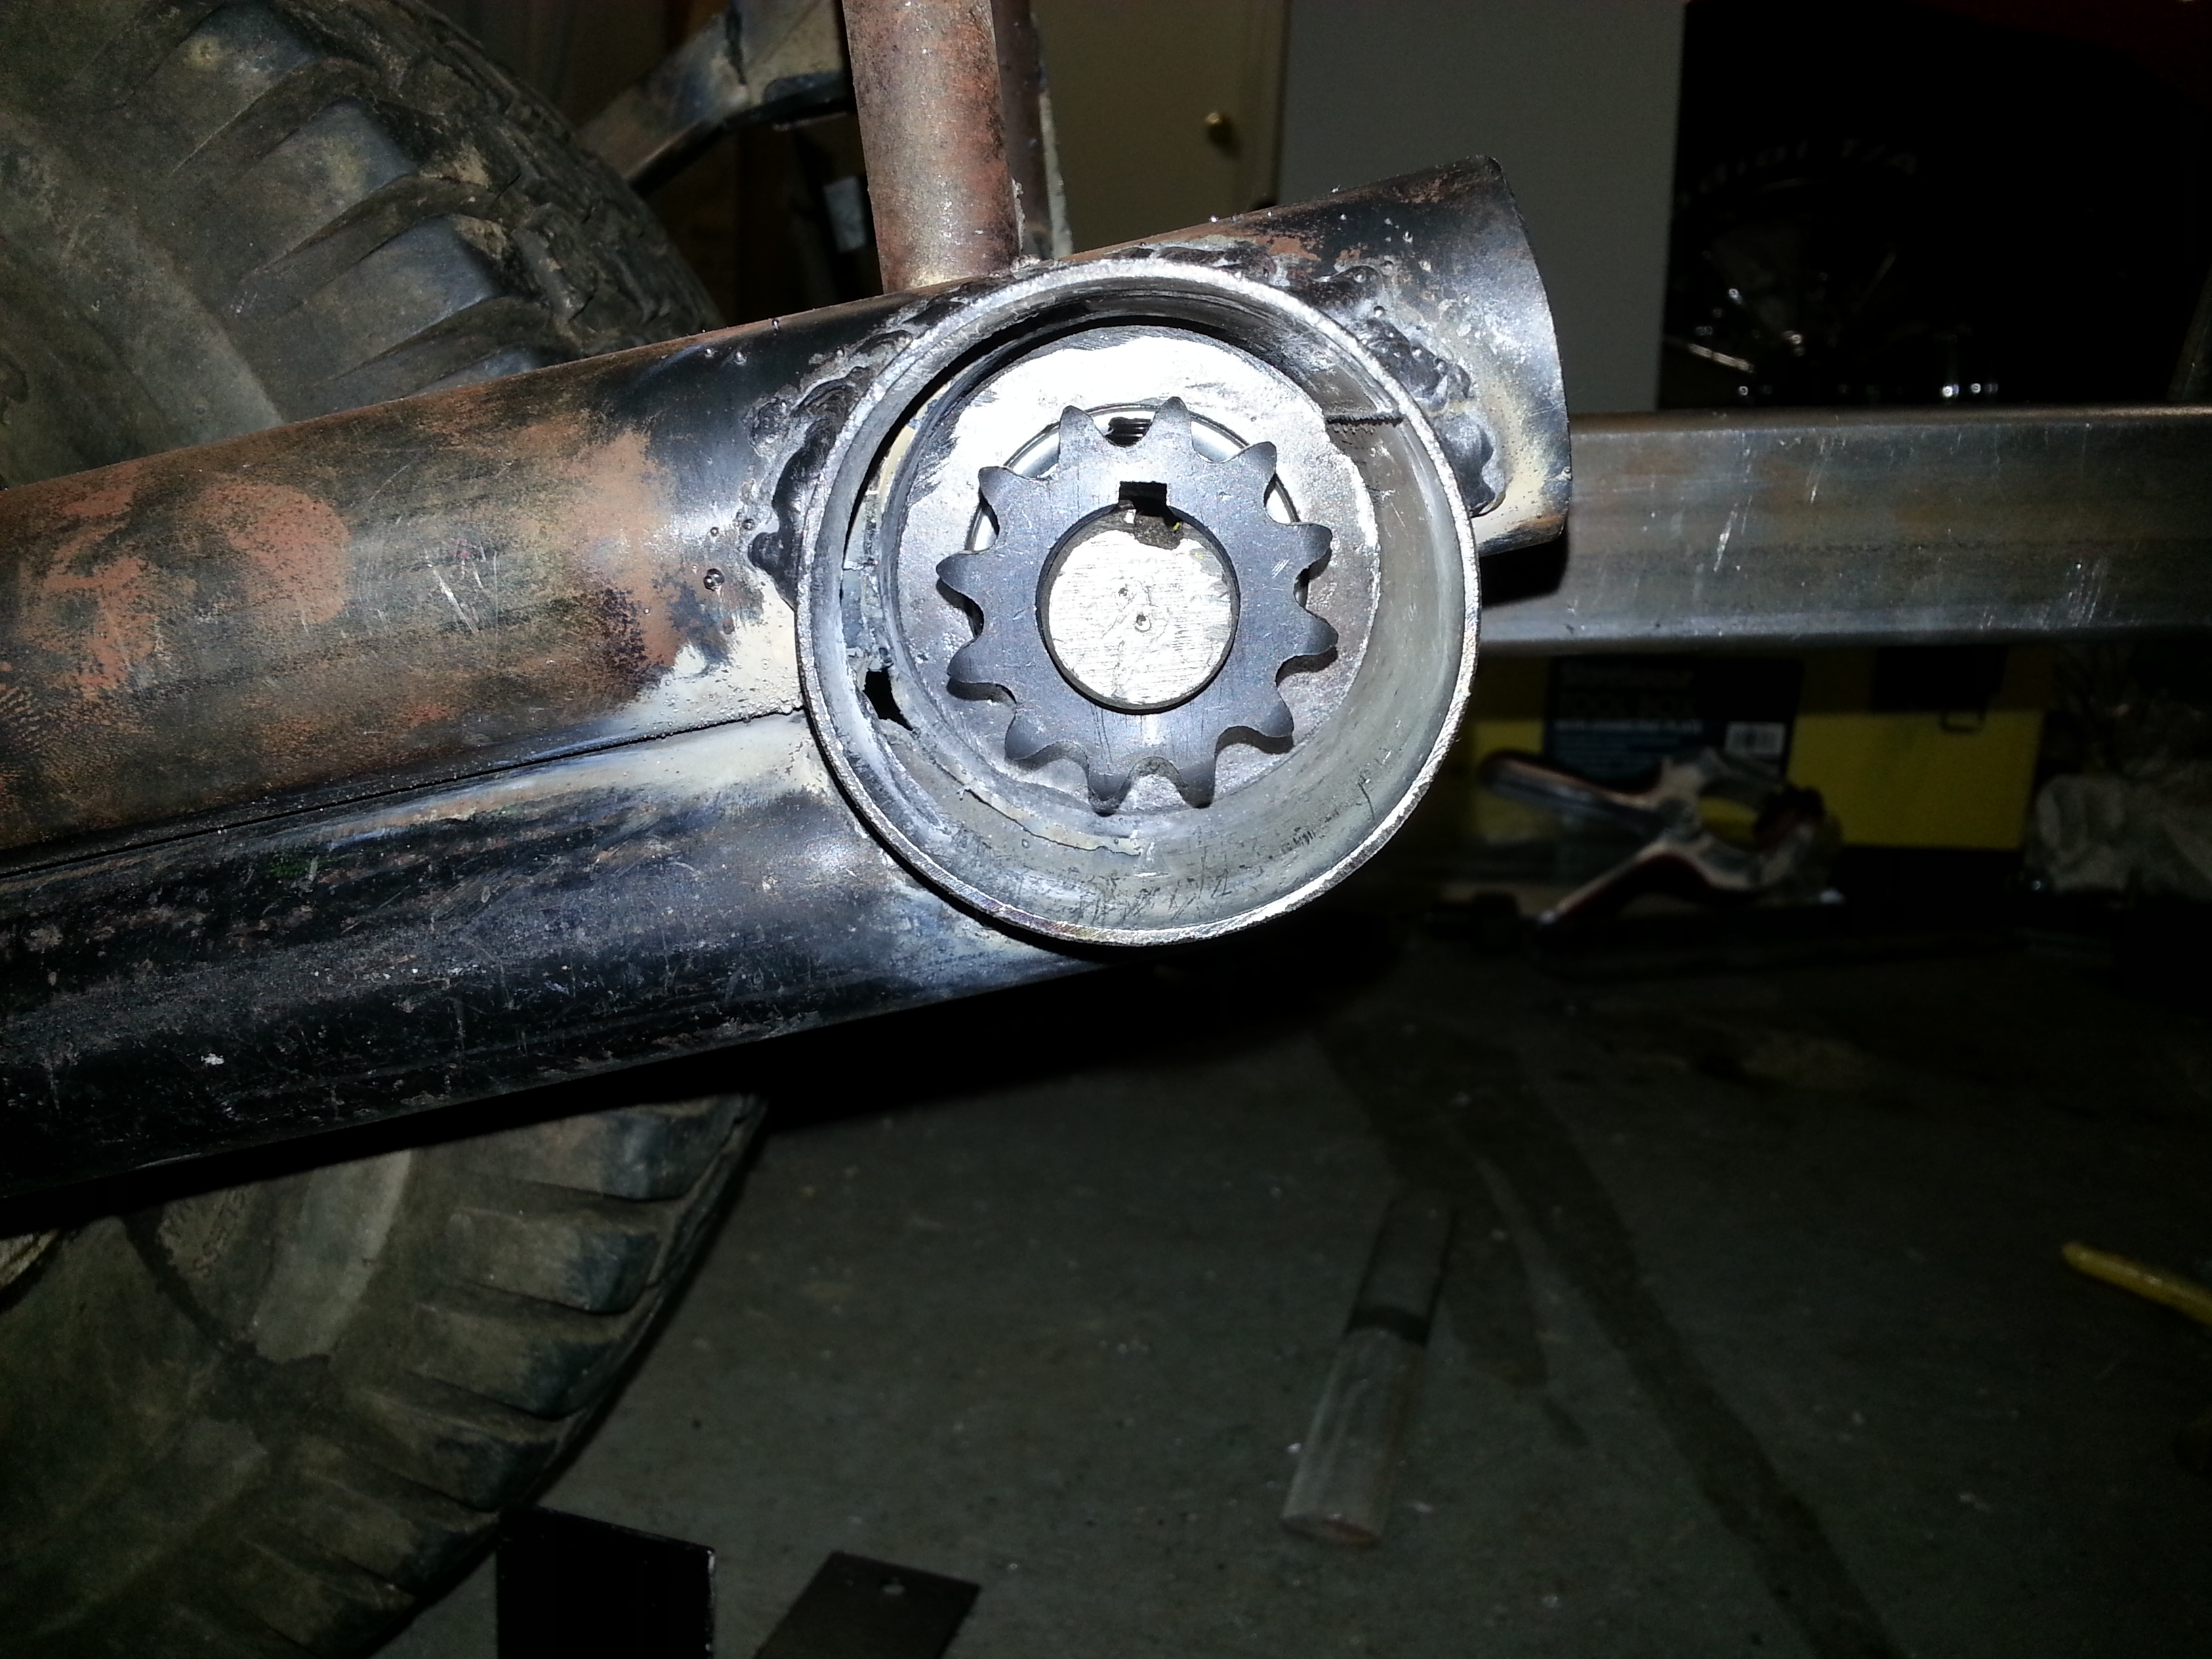
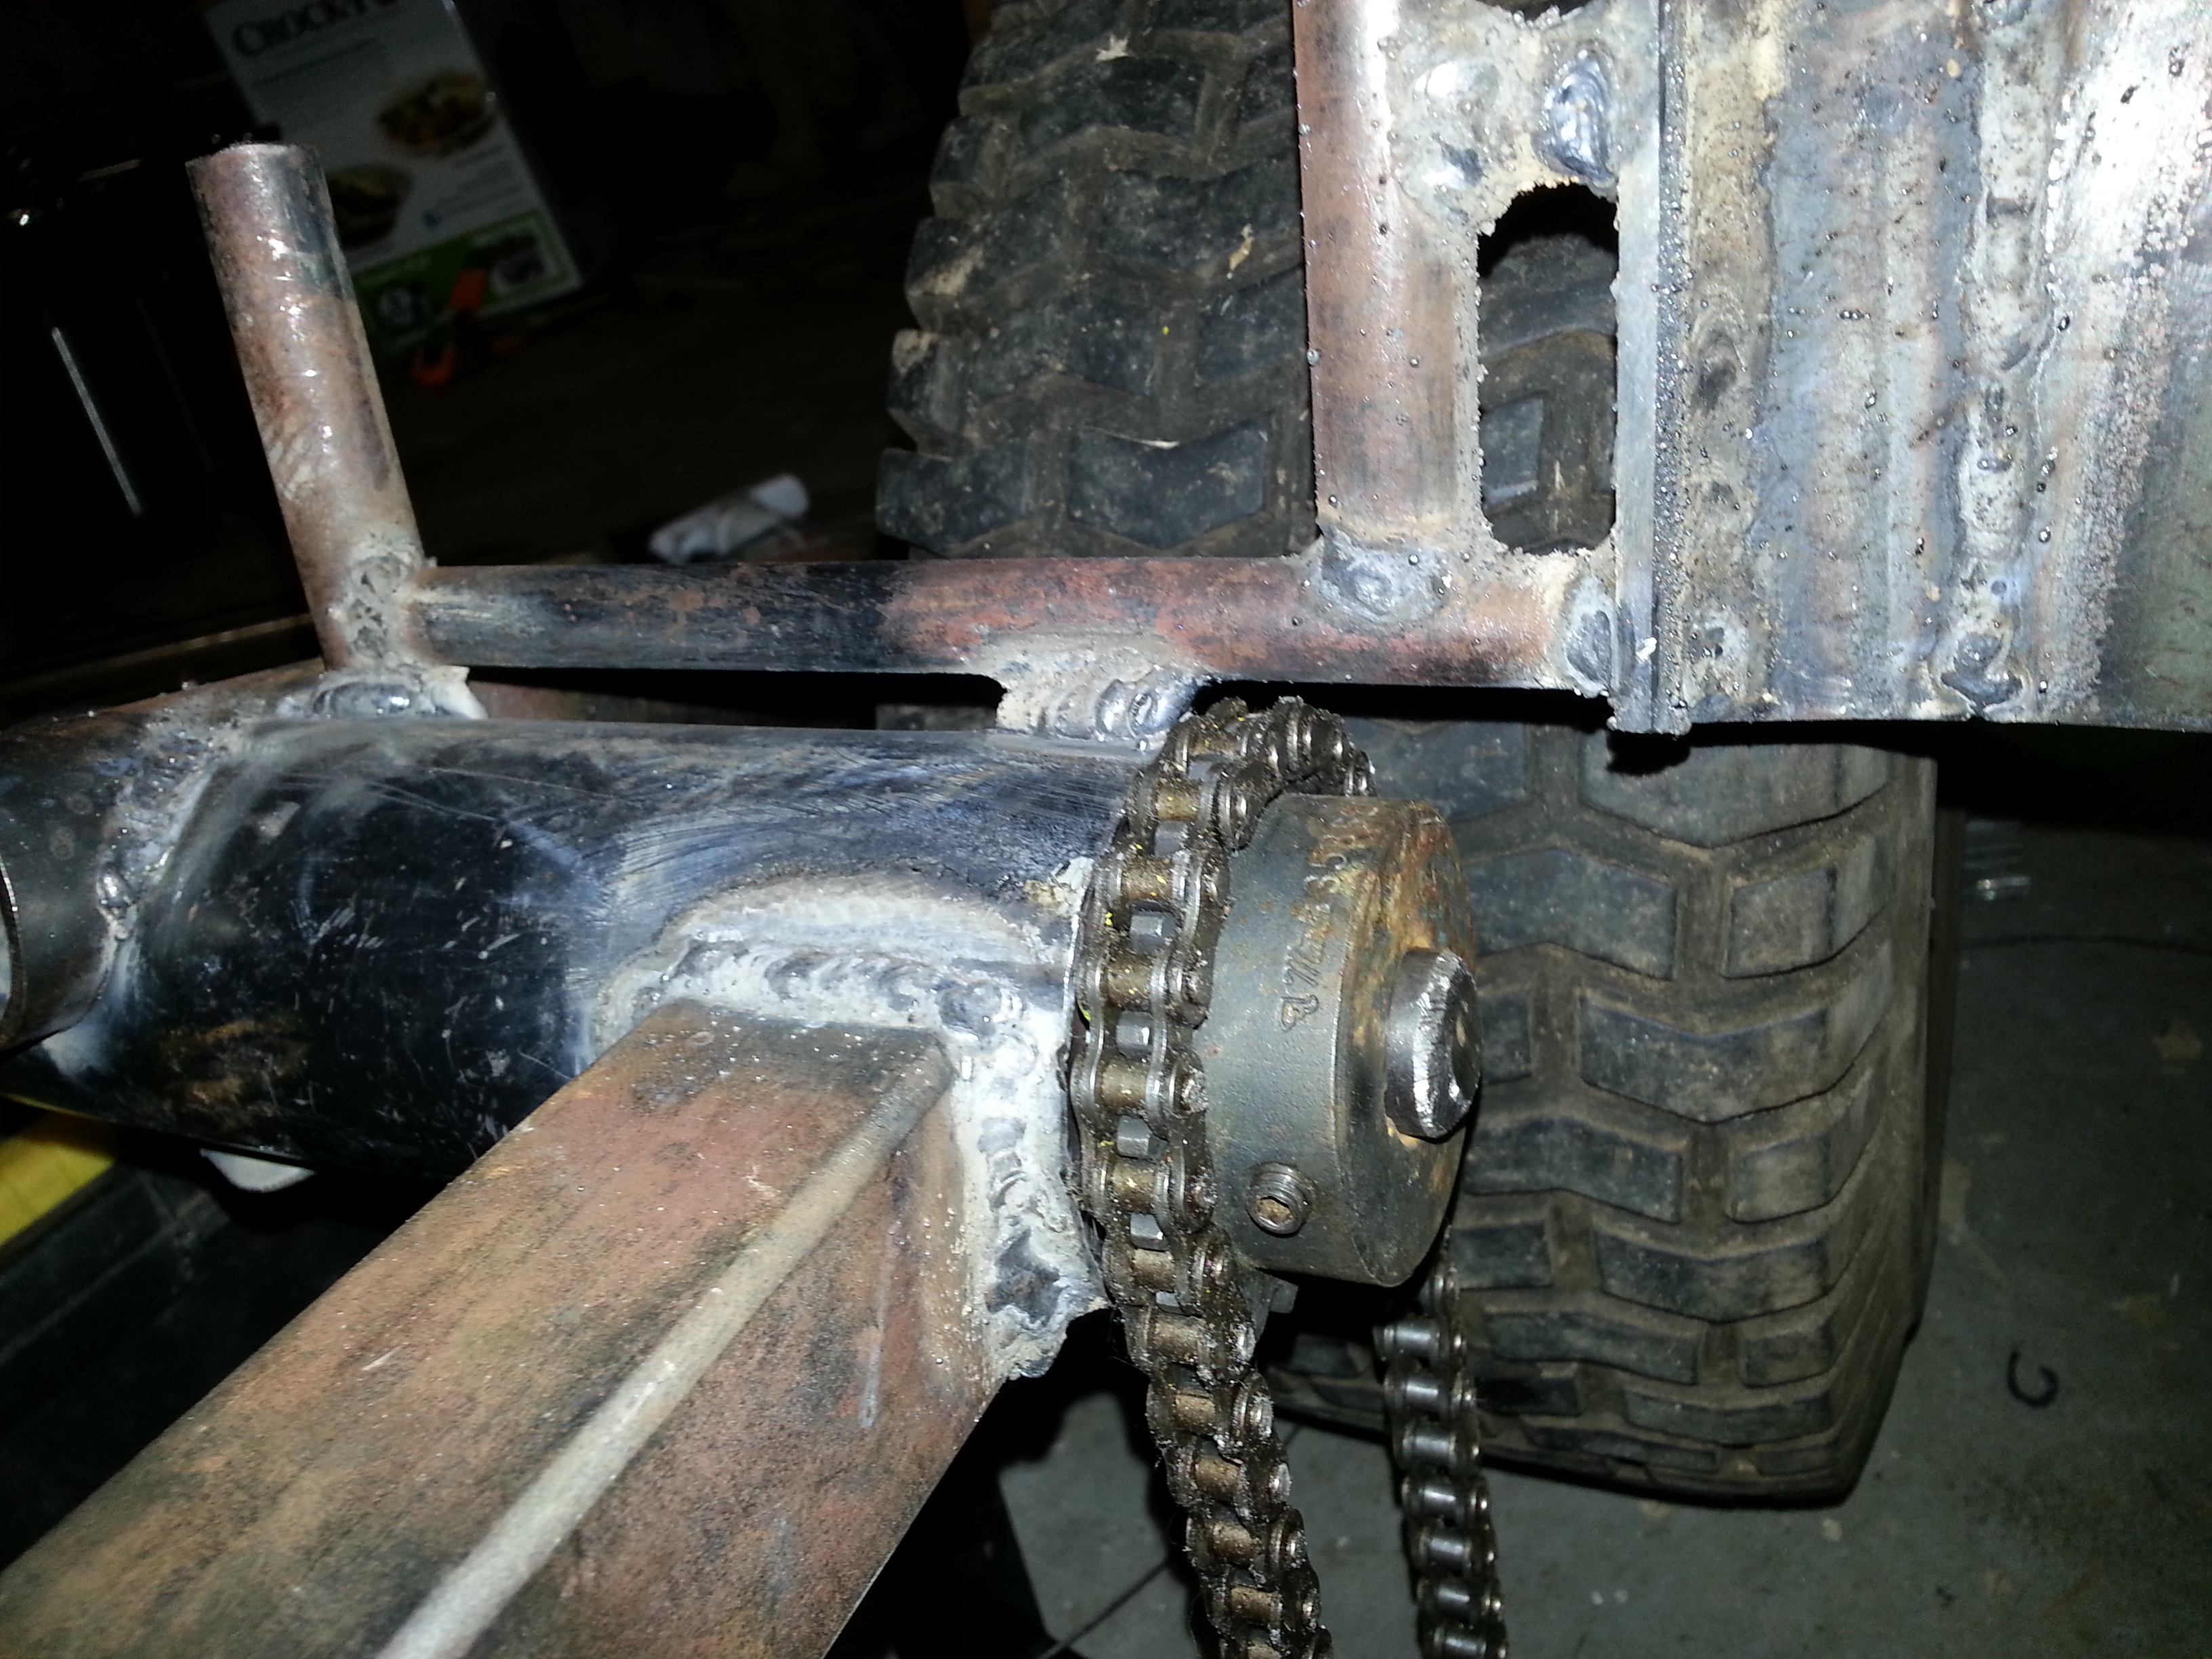
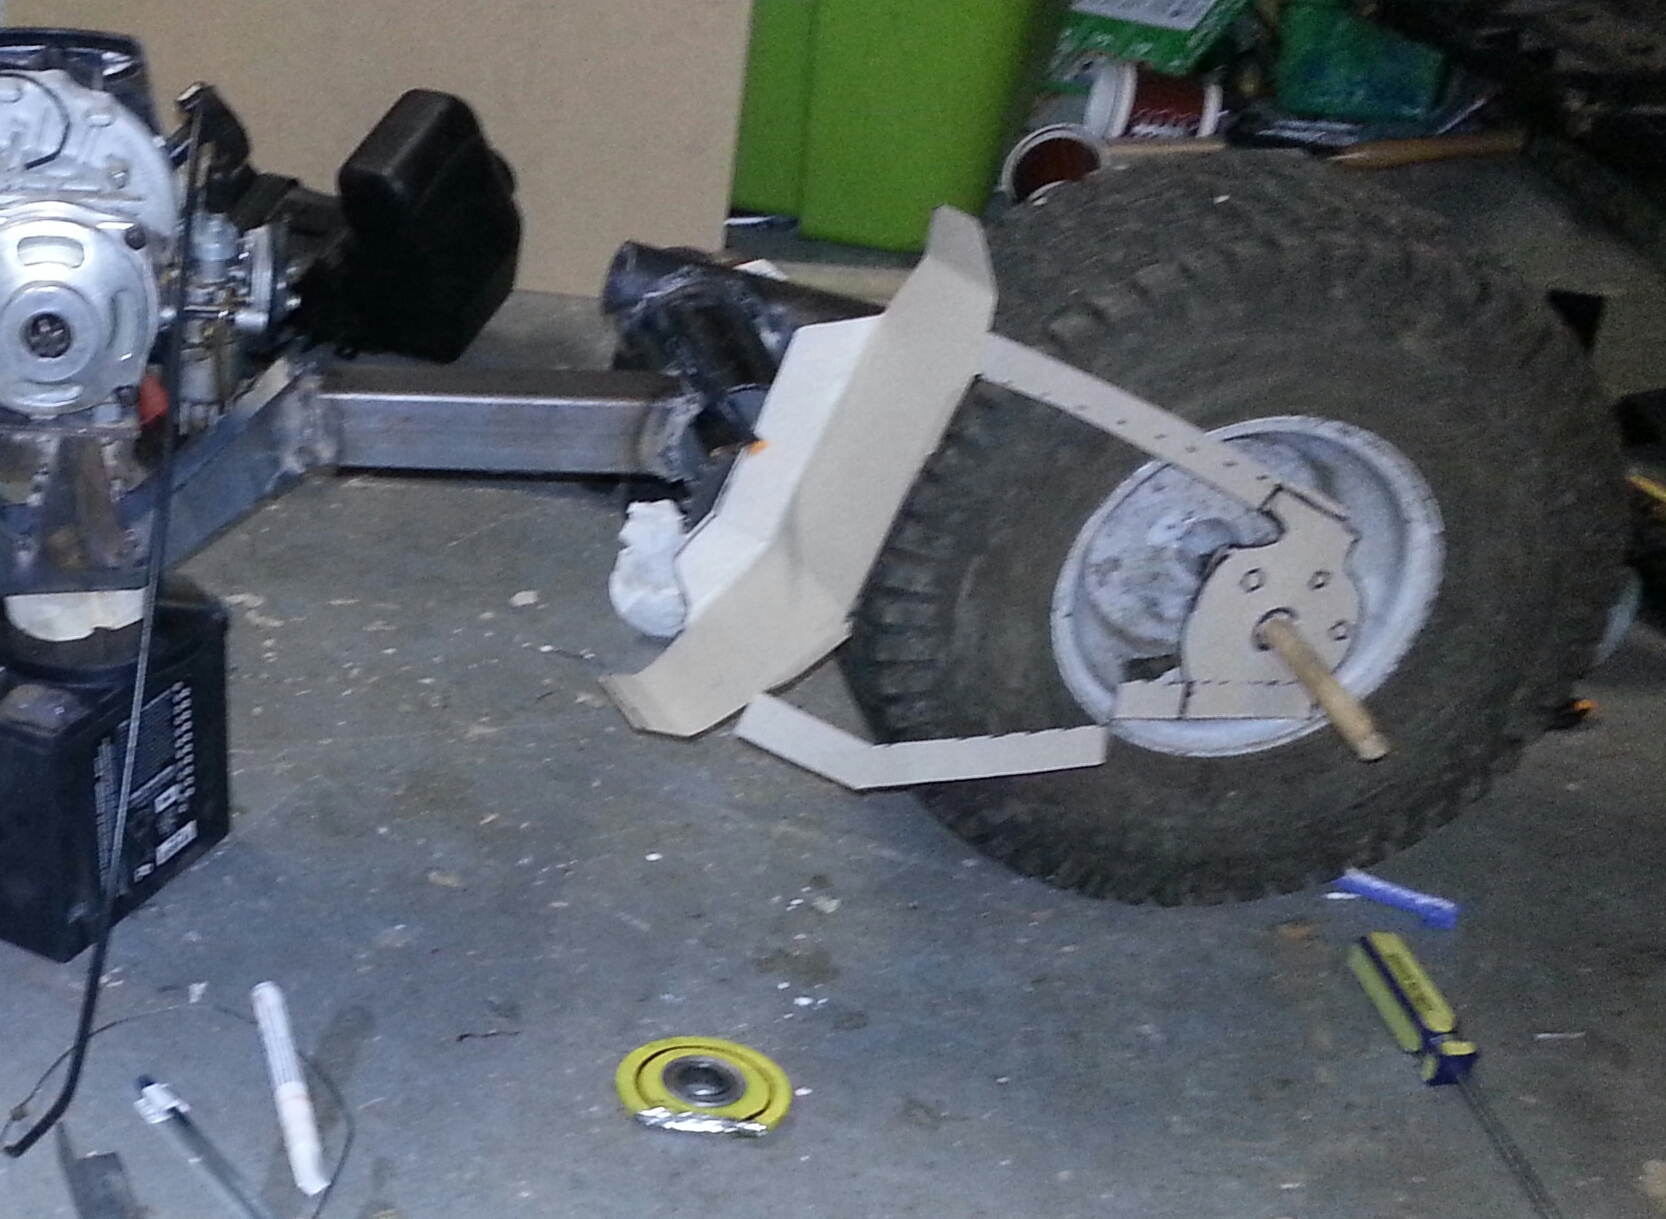
Also welded on the bearings which support the front short jackshaft (the yellow things).  The clearly too-long chain is loosely set there to look at alignment.frontJackshaft

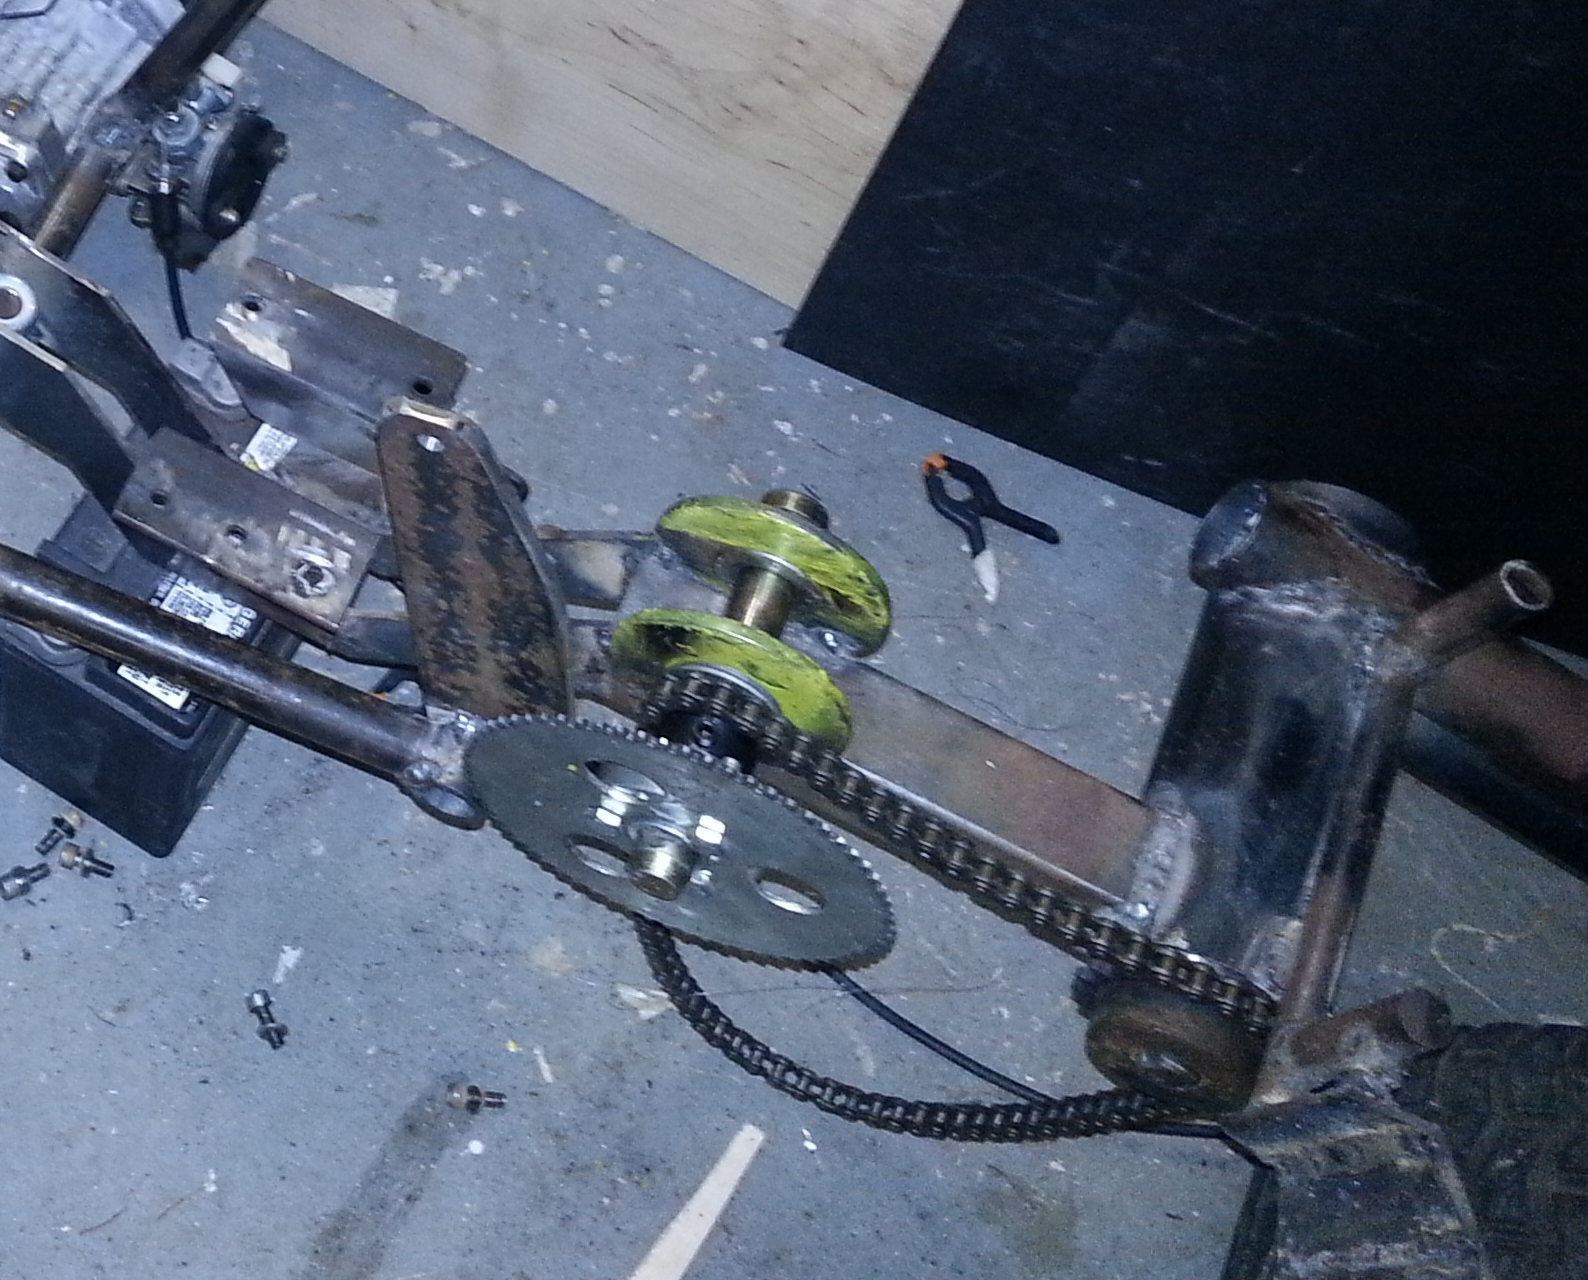
I did a little video of the handlebars rotating, which you can see on the Videos page.

Handlebars

Been a few days of working on the handlebars.  The nice thing so far has been the one-sidedness of the Batpod desgin, so I never had to make 2 sides match each other.  But this time, I had to mirror everything.  I have a post at the bottom center, which comes up through a round  pipe insert I’m welding into the frame, then have a nut on top, basically a sort of up facing short steering stem.  The bars will eventually turn a tab which pulls and pushes a tie rod.  I drew in where the final piece of handlebars will go for a little more of a comfortable grip angle than the real batpod.

barsGripsDrawn20140221_22594020140221_22450820140221_224502

Internal jackshaft bearings

Got the little 12 tooth sprockets that go inside the rear frame tubes. I set it up on the outside to show where the chains will run inside the frame tubes.  My clearances look like they should be perfect.

20140215_213756

So next up, I needed to get some jackshaft bearings in that frame tube.  I welded 2 different sized washers together.  one with the right outside diameter to fit in the frame tube, and one with the right inside diameter for the bearing to press into (press by hand).  The outside of the bearing just happens to fit great in the inside diameter of the larger washer as well.  I made 2 of these washer bearing retainers.  Then welded a short tube to connect each set of washers.  This whole unit will slide into the frame tube, and then just slide the jackshaft through the bearings, put the sprockets on the jackshaft, and its ready to go.  Will also have a bolt thread through the outer tube, into the inner tube, to hold everything from moving around.

JackShaftBearing20140216_22195120140216_22222220140216_232859

Suspension Test #1

I got the left side of the rear end welded it in place, as I am doing more of a standard 2 sided hard-tail rear end, but just making it look like the 1-sided style of the real batpod.

20140213_21594520140213_215955

I also finished the shock mounts, and the connecting rod between the main frame pivot point bolt and the rear shock mount (the boomerang looking piece).  Once that was all done, it was time to put it together and test out the suspension, and roll it around.  It had awesome balance, and the suspension is pretty plush.  May need a stiffer shock now, or as the riders get older, we’ll see once I do some more tests.


Rear frame and Shock mounts

I finished the main parts of the left side of the rear end, which supports the left footrest/peg. The real one hides a small radiator, so I’ll probably fake a radiator there later for looks.   I included the tabs that hold the radiator in place into the design by cutting notches out of some angle iron.  There will also be a square top cap piece welded in place later with some slotted holes to complete the look.

20140205_23091320140208_225716-1

I also welded the front shock mounts to the pivot tube, and began figuring out the rear shock mount.  The shock goes higher than I’d like in the back, to clear the motor, but it will all be hidden by the silver body panels later. And I will probably trim down the width of that tall mount to lighten the load.  There will also be a support bar from the main pivot bolt to the bottom of the rear shock mount to be done soon.

20140209_200845

Little this, little that

I made the front spindle and axle setup, just need to add a steering arm, tie rod etc, once I get e better feel for where I want them.

20140203_00032720140203_000417

I also began mocking up the left side structure to the rear wheel, which supports the foot rest, etc.

20140203_234838-1

And as a side project, I found, well, i don’t even know, some bamboo insense tray or something at a thrift store for like $2.  I noticed it could work for the hand guards. I find it odd the hand guards are different from each other, the left versus right, but hey, I’m just copying the design, so I’ll make mine match the real thing.  I mixed epoxy resin with some microfiller to thicken it up into a paste, and began spreading it on where I want raised surfaces.  It’ll take some sanding, dremeling, and adding more resin, and doing a final resin coat once done, but so far so good.  This is both sides, on this one thing, so at some point I’ll cut this in half.

20140128_08334820140205_081625

Motor Mounts

I decided where to mount the motor, then cut and bolted some angle iron pieces to the bottom of the motor.  Then cut out some mounts to weld to the frame, and to the angle iron and tacked everything in place.  The triangle mounts are emulating the ones used on the real batpod.

20140130_232133-120140201_233823

I also cut out the brackets for the monoshock where it mounts to the front pivot tube.

20140201_215602